VMs on Kubernetes (kubevirt)
KubeVirt is an open-source project for supporting KVM based VMs on a Kubernetes cluster.
Diamanti supports running virtual machines on Kubernetes cluster with all the Diamanti networking and storage services that are available for Kubernetes resources such as deployments, pods, etc. Guide defines both CLI and GUI method to use kubevirt.
Prerequisite
VM images should have virtio network drivers installed for networking to work. We can install virtio drivers while creating VM specied in section “To launch the Virtual Machine”
Using KubeVirt CLI
You can use the Diamanti CLI to perform KubeVirt operations.
To enable kubevirt, update the field
actionwith the valueenableand apply spec file /usr/share/diamanti/manifests/examples/k8scrs/feature-kubevirt-cr.yaml as shown belowapiVersion: spektra.diamanti.io/v1alpha1 kind: Feature metadata: name: kubevirt spec: action: enable kubevirtConfig: {}
$ kubectl create -f /usr/share/diamanti/manifests/examples/k8scrs/feature-kubevirt-cr.yaml
To check that KubeVirt feature is enabled at the cluster level, use the following command:
$ kubectl get features.spektra.diamanti.io
  NAME       AGE
  kubevirt   2m17s
To enable Kubevirt on a node, update the kubevirt feature with following command:
Note
Update
nodeListwith list of nodes on which kubevirt is to be enabled,operationwould beaddandactionwould beupdate.$ kubectl edit features.spektra.diamanti.io kubevirt feature.spektra.diamanti.io/kubevirt edited # Please edit the object below. Lines beginning with a '#' will be ignored, # and an empty file will abort the edit. If an error occurs while saving this file will be # reopened with the relevant failures. # apiVersion: spektra.diamanti.io/v1alpha1 kind: Feature metadata: creationTimestamp: "2021-06-08T06:48:10Z" finalizers: - diamanti-controller generation: 4 name: kubevirt resourceVersion: "4195" selfLink: /apis/spektra.diamanti.io/v1alpha1/features/kubevirt uid: b1323522-d808-4316-9703-d4b1e56f5989 spec: KubevirtConfig: nodeList: - appserv64 - appserv65 operation: add action: update status: kubevirtStatus: nodeList: - appserv64 - appserv65 state: enable phase: SuccessVerify that all the Kubevirt associated pods and the CDI posts are started on nodes where Kubevirt is enabled.
$ kubectl get pods -n kubevirt && kubectl get pods -n cdi
NAMESPACE         NAME                                             READY   STATUS    RESTARTS   AGE    IP              NODE        NOMINATED NODE   READINESS GATES
cdi               cdi-apiserver-78ddcf9dbf-w8cvc                   1/1     Running   0          76s    172.16.153.12   appserv66   <none> <none>
cdi               cdi-deployment-9c88fc958-lrbrn                   1/1     Running   0          69s    172.16.153.15   appserv66   <none> <none>
cdi               cdi-operator-6f7f5b9654-v8mwx                    1/1     Running   0          86s    172.16.153.8    appserv66   <none> <none>
cdi               cdi-uploadproxy-f7756dc78-vn4ch                  1/1     Running   0          64s    172.16.153.16   appserv66   <none> <none>
kube-system       mutating-webhook-57746d4dc8-dr2nk                1/1     Running   0          84s    172.16.153.10   appserv66   <none> <none>
kubevirt          virt-api-f8c579d56-dktbc                         1/1     Running   0          74s    172.16.153.13   appserv66   <none> <none>
kubevirt          virt-api-f8c579d56-zbg5c                         1/1     Running   0          74s    172.16.153.14   appserv66   <none> <none>
kubevirt          virt-controller-7b5b4b6d48-5jw2t                 1/1     Running   0          51s    172.16.153.19   appserv66   <none> <none>
kubevirt          virt-controller-7b5b4b6d48-msl8s                 1/1     Running   0          51s    172.16.153.17   appserv66   <none> <none>
kubevirt          virt-handler-l6fjc                               1/1     Running   0          51s    172.16.153.18   appserv66   <none> <none>
kubevirt          virt-operator-5d6544596c-kt2vp                   1/1     Running   0          101s   172.16.153.7    appserv66   <none> <none>
kubevirt          virt-operator-5d6544596c-s5thn                   1/1     Running   0          101s   172.16.153.6    appserv66   <none> <none>
kubevirt          virtvnc-786f689959-jlmz4                         1/1     Running   0          86s    172.16.153.9    appserv66   <none> <none>
To create VM, first the qcow2 image containing OS needs to be uploaded to PVC and then the VM can be created using the same PVC. To upload the VM, modify the CR file /usr/share/diamanti/manifests/examples/k8scrs/virtual-machine-cr.yaml. The qcow2 file needs to be available on the node specified by
nodeNameat path specified inimagePath. Theactionfield in the file should have a valueimage-upload.virtualMachineNameis name with which virtualMachine should be created. If this is first drivedataDrivefield will befalse. To get the the pvc size please refer Calculate the size of pvc to be uploaded.Note
name in Kind VirtualMachine should be same as VirtualMachineName.
- In a VM with multiple disks and mirroring enabled, all the plexes of all the disks may not be created on the same node. When you move a virtual machine from one node to another, some disk plexes will be attached remotely because not all disks will be on the new node.
As the plexes cannot be attached remotely, we need to use selectors in storage classes and add them as labels on nodes where plexes should be created to enforce that all plexes of all disks are created on the same node. For more information see, Create a Custom StorageClass Object.
apiVersion: spektra.diamanti.io/v1alpha1
kind: VirtualMachine
metadata:
  name: centos
spec:
  action: image-upload
  virtualMachineName: centos
  virtualMachineConfig:
    pvcName: centos-os
    pvcSize: 100Gi
    nodeName: appserv65
    storageClass: “”
    namespace: default
    imagePath: /home/diamanti/centos-os.qcow2
    insecure: true
    dataDrive: false
Apply the CR spec
$ kubectl create -f /usr/share/diamanti/manifests/examples/k8scrs/virtual-machine-cr.yaml
Run the following command to check the status of upload
$ kubectl describe virtualmachines.spektra.diamanti.io  centos | grep Status -A 2

     Status:
           Phase:   Pending
           Reason:  image-upload in progressing.

     The image upload is progressing
A successful image upload will show a Phase value of Success, while a failure will show a Phase value of Pending and Reason of Failure will specify the reason.
$ kubectl describe virtualmachine.spektra.diamanti.io/centos7 | grep Phase -A 2

     Phase:  Success
     Events:   <none>
To upload subsequent qcow images for the same VirtualMachine copy the above spec with following changes,
namewould be different, you can use the convention of naming it as centos-data<number> examplecentos-data-0,actionwould beimage-upload,VirtualMachineNamewould be samecentos, modifyvirtualMachiMachineConfigdepending upon the name and size of pvc and location of qcow2 image to be uploaded.Note
dataDrive field will be true in this case.
apiVersion: spektra.diamanti.io/v1alpha1
kind: VirtualMachine
metadata:
  name: centos-data-0
spec:
  action: image-upload
  virtualMachineName: centos
  virtualMachineConfig:
    pvcName: centos-data-0
    pvcSize: 5Gi
    nodeName: appserv65
    storageClass: “”
    namespace: default
    imagePath: /home/diamanti/centos-data-0.qcow2
    insecure: true
    dataDrive: true
Apply the CR spec
$ kubectl create -f /usr/share/diamanti/manifests/examples/k8scrs/virtual-machine-cr-data-0.yaml
To launch the Virtual Machine’s use following spec and apply it. This is an example spec file with one OS drive, centos-os, one uploaded data drive,
centos-data-0, and one data volume,centos1-data. The data volume PVC spec is included as part of this YAML file for convenience.apiVersion: v1 kind: PersistentVolumeClaim metadata: name: centos-data-1 spec: accessModes: - ReadWriteOnce volumeMode: Block resources: requests: storage: 80Gi storageClassName: high ------
apiVersion: kubevirt.io/v1alpha3
kind: VirtualMachine
metadata:
 name: centos
 annotations:
    diamanti.com/endpoint0: '{"network":"default","perfTier":"high"}'
spec:
 running: false
 template:
   metadata:
     labels:
       kubevirt.io/domain: centos
   spec:
     domain:
       ioThreadsPolicy: auto
       cpu:
         cores: 8
       devices:
         blockMultiQueue: true
         disks:
         - disk:
             bus: virtio
           name: harddrive
         - disk:
             bus: virtio
           name: harddrive1
         - disk:
             bus: virtio
           name: harddrive2
           dedicatedIOThread: true
         - cdrom:
             bus: sata
           name: virtiocontainerdisk
        firmware:
          bootloader:
            efi:
              secureBoot: false
       machine:
         type: q35
       resources:
         requests:
           memory: 16G
     volumes:
     - name: harddrive
       persistentVolumeClaim:
         claimName: centos1-os
     - name: harddrive1
       persistentVolumeClaim:
         claimName: centos1-data-0
     - name: harddrive2
       persistentVolumeClaim:
         claimName: centos1-data-1
     - name: virtiocontainerdisk
       containerDisk:
         image: kubevirt/virtio-container-disk
         imagePullPolicy: IfNotPresent
Note
virtiocontainerdisk is used to install virtio drivers for windows VM. It will be mounted as cdrom in a VM. Linux generally has virtio drivers installed in them. Please refer to the installation instructions for installing virtio drivers in windows.
Bios firmware specified is efi since some qcow images could be created using efi bios. If bios is legacy then remove all the fields under firmware, including the
firmwarekeyword.Bus for disk is used as virtio, assuming that virtio drivers are part of image and part of initrd for Linux. Other values of bus can be “sata” or “scsi”.
If bios or bus type of disk is not specified correctly then you may get boot device not found in the terminal after the VM is started. Try changing bus type and bios to the supported values.
Apply the spec
$ kubectl apply -f centos.yaml
Example specs
/usr/share/diamanti/manifests/examples/kubevirt-vm-spec/centos-ue-efi-endpoint.yaml

/usr/share/diamanti/manifests/examples/kubevirt-vm-spec/windows-qcow2-ue-efi-endpoint.yaml

/usr/share/diamanti/manifests/examples/kubevirt-vm-spec/centos-ue-endpoint.yaml

/usr/share/diamanti/manifests/examples/kubevirt-vm-spec/windows-qcow2-ue-endpoint.yaml
To Use Existing PVC’s in a VM.
Create a VM using spec from above step with existing PVC’s as disks. Modify required fields as per VM requirements and disk type used.
Create a diamanti Virtual Machine object using the following spec.
Note
namefield in metadata andvirtualMachineNamefield will have same value as name of Virtual Machine created in step(1).dataDrivefield will befalse.namespacefield will be namespace of VM.
Since there is no need to upload a qcow2 to a PVC as we are using existing PVC other fields are not required.
apiVersion: spektra.diamanti.io/v1alpha1
kind: VirtualMachine
metadata:
  name: centos
spec:
  action: start
  virtualMachineName: centos
  virtualMachineConfig:
    namespace: default
    dataDrive: false
Apply the CR spec
$ kubectl create -f /usr/share/diamanti/manifests/examples/k8scrs/virtual-machine-cr-os.yaml
To start the Virutal Machine edit following centos CR and specify “stop” in action.
$kubectl edit virtualmachines.spektra.diamanti.io centos
 virtualmachine.spektra.diamanti.io/centos edited


 # Please edit the object below. Lines beginning with a '#' will be ignored,
 # and an empty file will abort the edit. If an error occurs while saving this file will be
 # reopened with the relevant failures.
 #

  apiVersion: spektra.diamanti.io/v1alpha1
  kind: VirtualMachine
  metadata:
    creationTimestamp: "2021-04-07T05:50:50Z"
    finalizers:
    - diamanti-controller
    generation: 4
    name: centos
    resourceVersion: "396968"
    selfLink: /apis/spektra.diamanti.io/v1alpha1/virtualmachines/centos
    uid: 0b4ad372-670a-4d60-be68-2f755ad4bae7
  spec:
    action: start
    virtualMachineName: centos
    virtualMachineConfig:
      pvcName: centos-os
      pvcSize: 100Gi
      nodeName: appserv65
      storageClass: “”
      namespace: default
      imagePath: /home/diamanti/centos-os.qcow2
      insecure: true
      dataDrive: false
Run the following command and check the output to check the start operation status.
kubectl describe virtualmachines.spektra.diamanti.io centos | grep Status -A 2
A field called Phase and Reason indicates whether a start succeeded or failed, as well as the reason for the failure.
To verify that the Virtual Machine’s pod is running
$ kubectl get vm
NAME      AGE   VOLUME
centos   10s
To get detailed information about the Virtual Machine
$ kubectl get vmi
NAME      AGE     PHASE     IP                 NODENAME
centos    7m32s   Running   172.16.153.11/24   appserv66
To access the Virtual Machine
For Linux based VMs with SSH
$ssh <VMI IP ADDRESS>
Note
username and password are configured during the creation of the qcow2 OS image.
Access the VM via the console (Windows and Linux)
[diamanti@diamanti-node1]$ kubectl get svc -n kubevirt virtvnc
NAME      TYPE       CLUSTER-IP   EXTERNAL-IP   PORT(S)          AGE
virtvnc   NodePort   10.0.0.120   <none> 8001:32597/TCP 9m22s

Then visit the following url in browser:
http://NODEIP:NODEPORT

e.g http://diamanti-node1:32597
To stop the Virutal Machine edit following centos CR and specify “stop” in action.
   $kubectl edit virtualmachines.spektra.diamanti.io centos
    virtualmachine.spektra.diamanti.io/centos edited


    # Please edit the object below. Lines beginning with a '#' will be ignored,
    # and an empty file will abort the edit. If an error occurs while saving this file will be
    # reopened with the relevant failures.
    #

     apiVersion: spektra.diamanti.io/v1alpha1
     kind: VirtualMachine
     metadata:
       creationTimestamp: "2021-04-07T05:50:50Z"
       finalizers:
       - diamanti-controller
       generation: 4
       name: centos
       resourceVersion: "396968"
       selfLink: /apis/spektra.diamanti.io/v1alpha1/virtualmachines/centos
       uid: 0b4ad372-670a-4d60-be68-2f755ad4bae7
     spec:
       action: stop
       virtualMachineName: centos
       virtualMachineConfig:
         pvcName: centos-os
         pvcSize: 100Gi
         nodeName: appserv65
         storageClass: “”
         namespace: default
         imagePath: /home/diamanti/centos-os.qcow2
         insecure: true
         dataDrive: false

Run the following command and check the output to check the start operation status.

.. code::

    kubectl describe virtualmachines.spektra.diamanti.io  centos | grep Status -A 2

A field called Phase and Reason indicates whether a start succeeded or failed, as well as the reason for the failure.
To remove a node from Kubevirt feature, edit the feature.spektra.diamanti.io/kubevirt object and remove the node from nodeList field.
Note
nodeListwill have nodes on which kubevirt is to be disabled,operationwould bedeleteandactionwould beupdate.$ kubectl edit features.spektra.diamanti.io kubevirt feature.spektra.diamanti.io/kubevirt edited # Please edit the object below. Lines beginning with a '#' will be ignored, # and an empty file will abort the edit. If an error occurs while saving this file will be # reopened with the relevant failures. # apiVersion: spektra.diamanti.io/v1alpha1 kind: Feature metadata: creationTimestamp: "2021-06-08T06:48:10Z" finalizers: - diamanti-controller generation: 4 name: kubevirt resourceVersion: "4195" selfLink: /apis/spektra.diamanti.io/v1alpha1/features/kubevirt uid: b1323522-d808-4316-9703-d4b1e56f5989 spec: KubevirtConfig: nodeList: - appserv64 - appserv65 operation: delete action: update status: kubevirtStatus: nodeList: - [] state: enable phase: SuccessTo disable Kubevirt feature, edit the feature.spektra.diamanti.io/kubevirt object and specify value of field “action” as disable.
Note
All node from
nodeListneeds to be removed for kubevirt to be disabled in a cluster$ kubectl edit features.spektra.diamanti.io kubevirt feature.spektra.diamanti.io/kubevirt edited # Please edit the object below. Lines beginning with a '#' will be ignored, # and an empty file will abort the edit. If an error occurs while saving this file will be # reopened with the relevant failures. # apiVersion: spektra.diamanti.io/v1alpha1 kind: Feature metadata: creationTimestamp: "2021-06-08T06:48:10Z" finalizers: - diamanti-controller generation: 4 name: kubevirt resourceVersion: "4195" selfLink: /apis/spektra.diamanti.io/v1alpha1/features/kubevirt uid: b1323522-d808-4316-9703-d4b1e56f5989 spec: action: disable kubevirtConfig:{}
Using KubeVirt UI
You can use the Diamanti UI to perform KubeVirt operations.
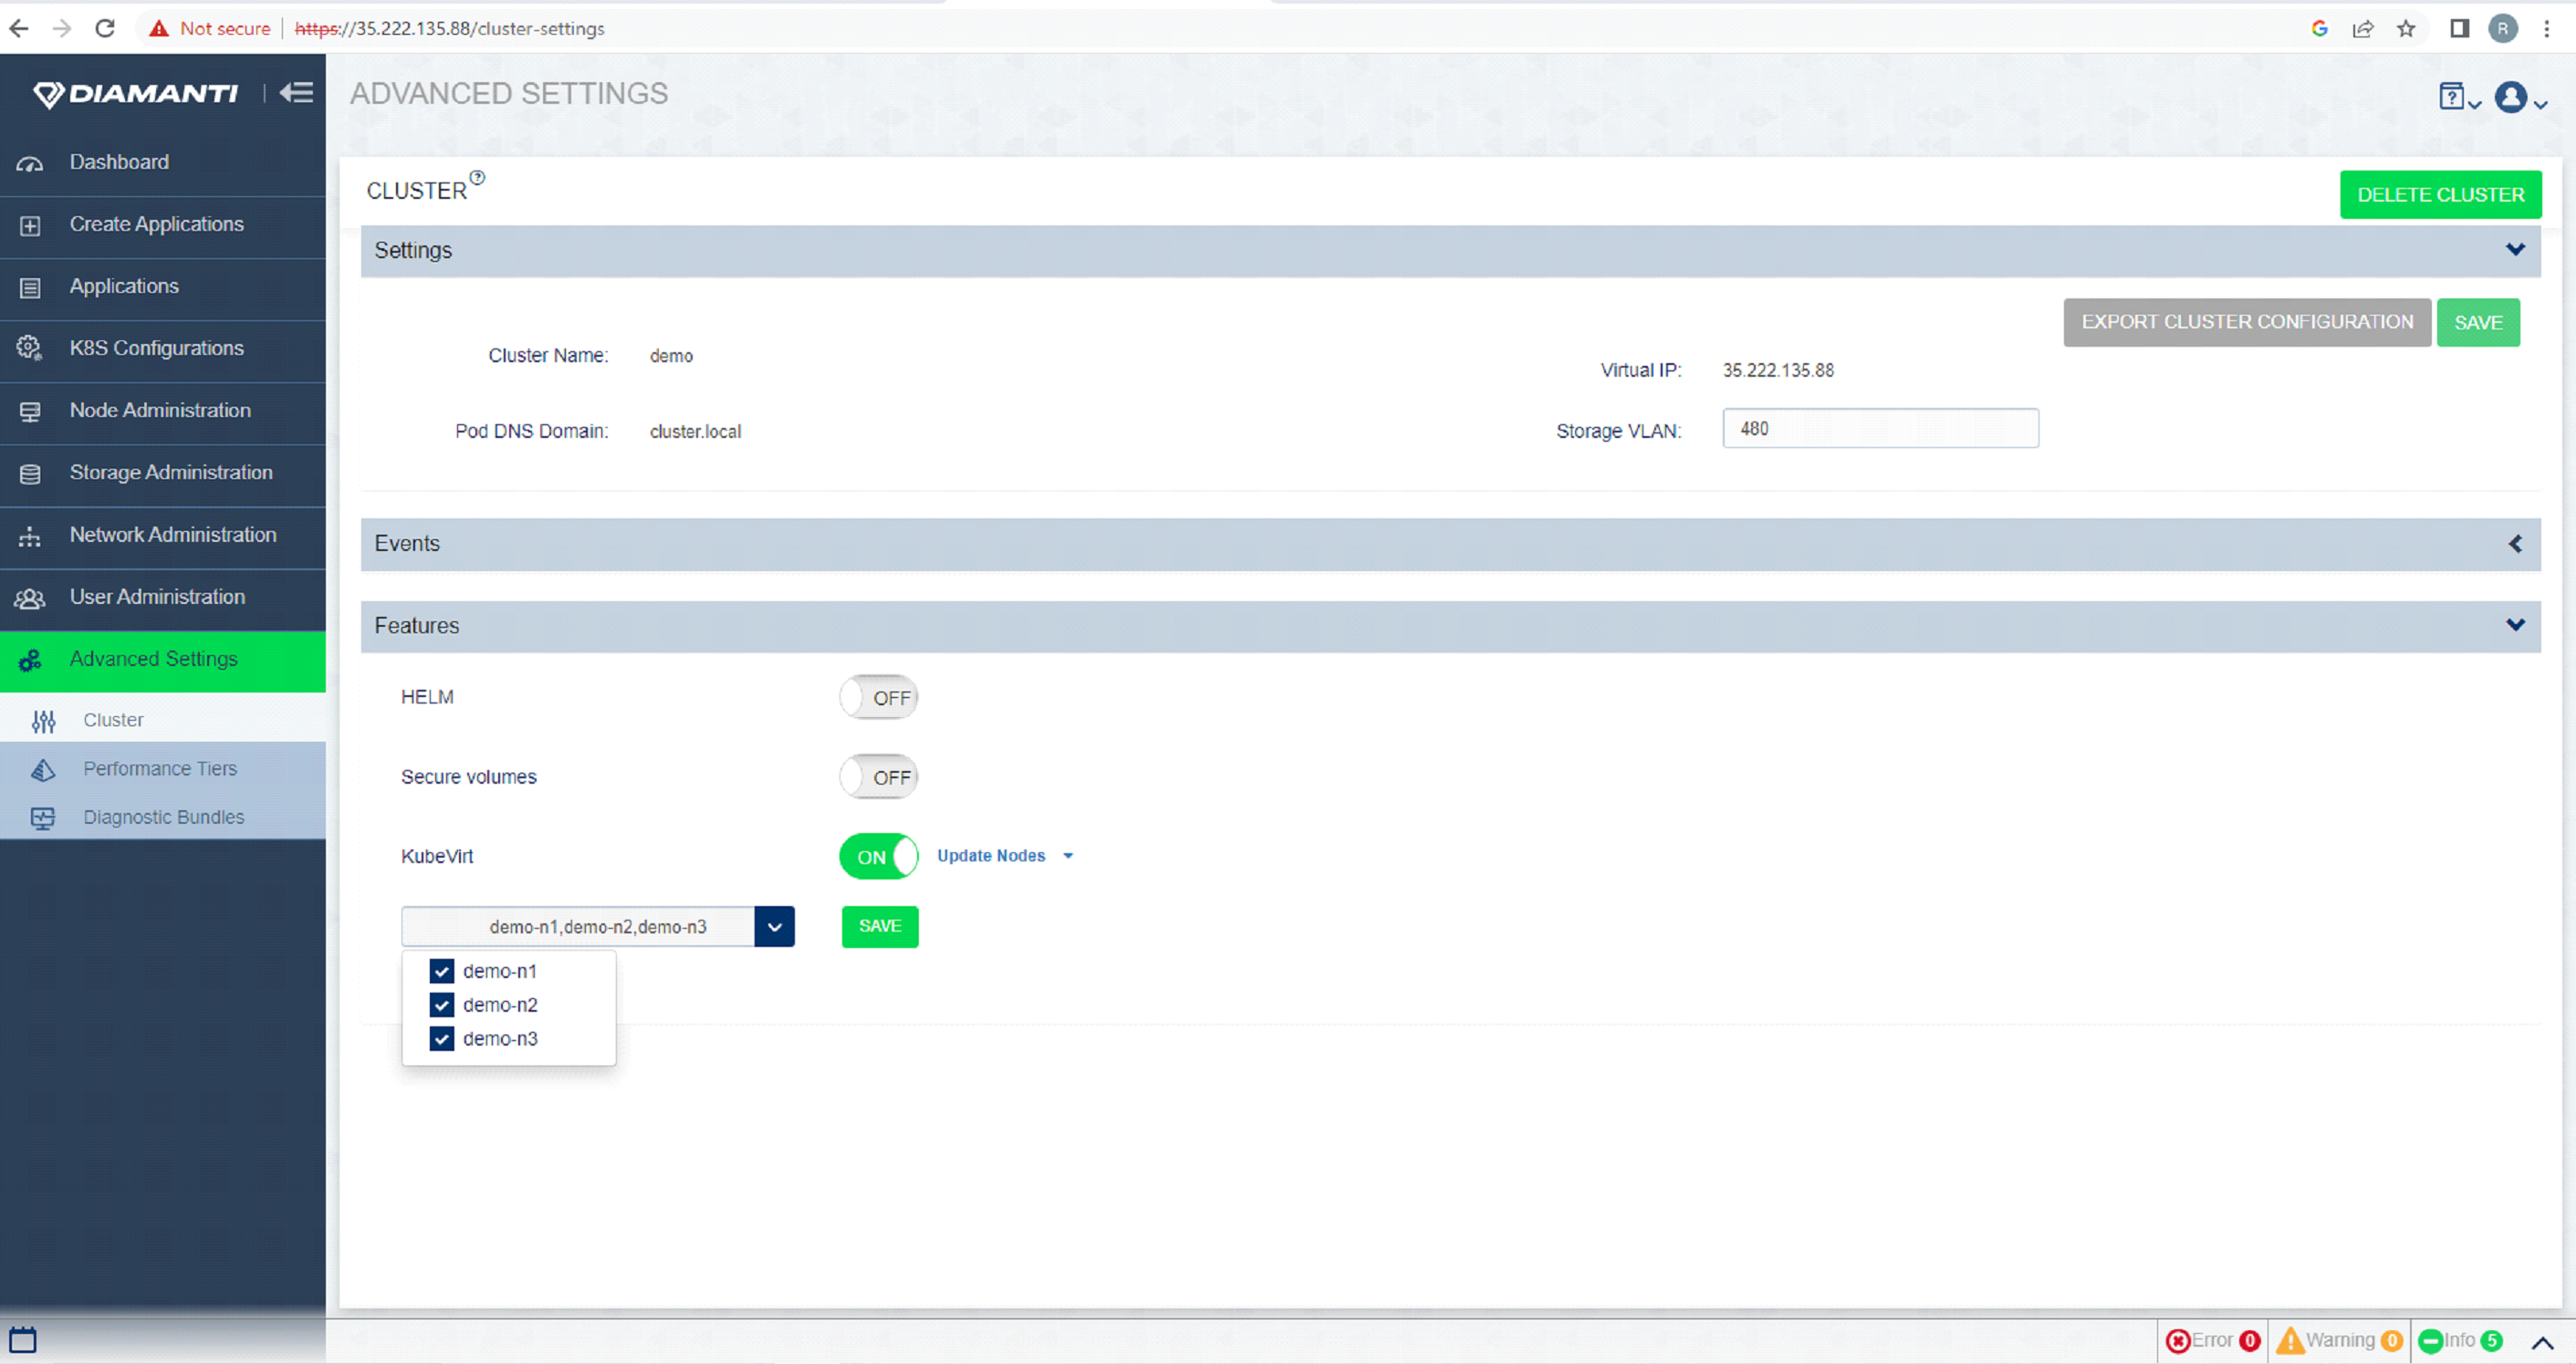
To enable KubeVirt, select Advanced Settings, and in Features slide the toggle to select KubeVirt.
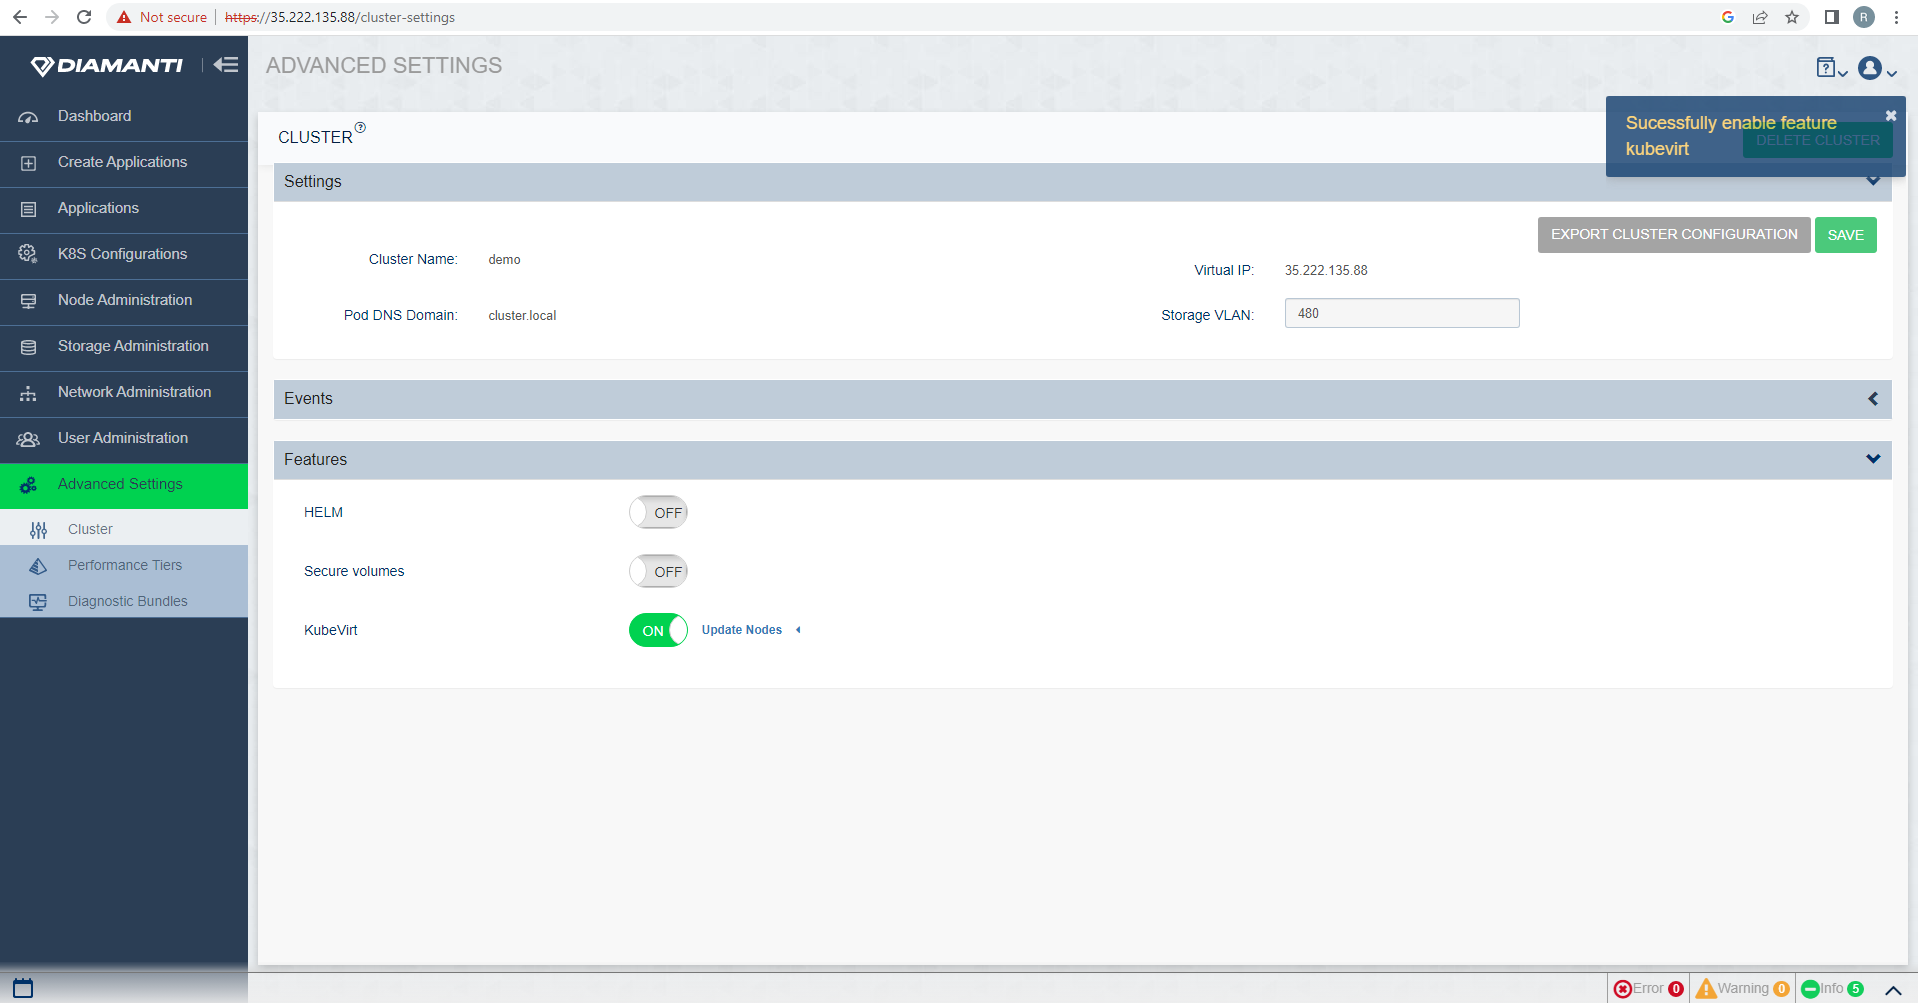
To Add nodes to host Kubevirt VM’s, select Advanced Setting –> Features –> Kubevirt –> Updatenodes, from the drop down list select the nodes you want to add, select Save to update the selection.


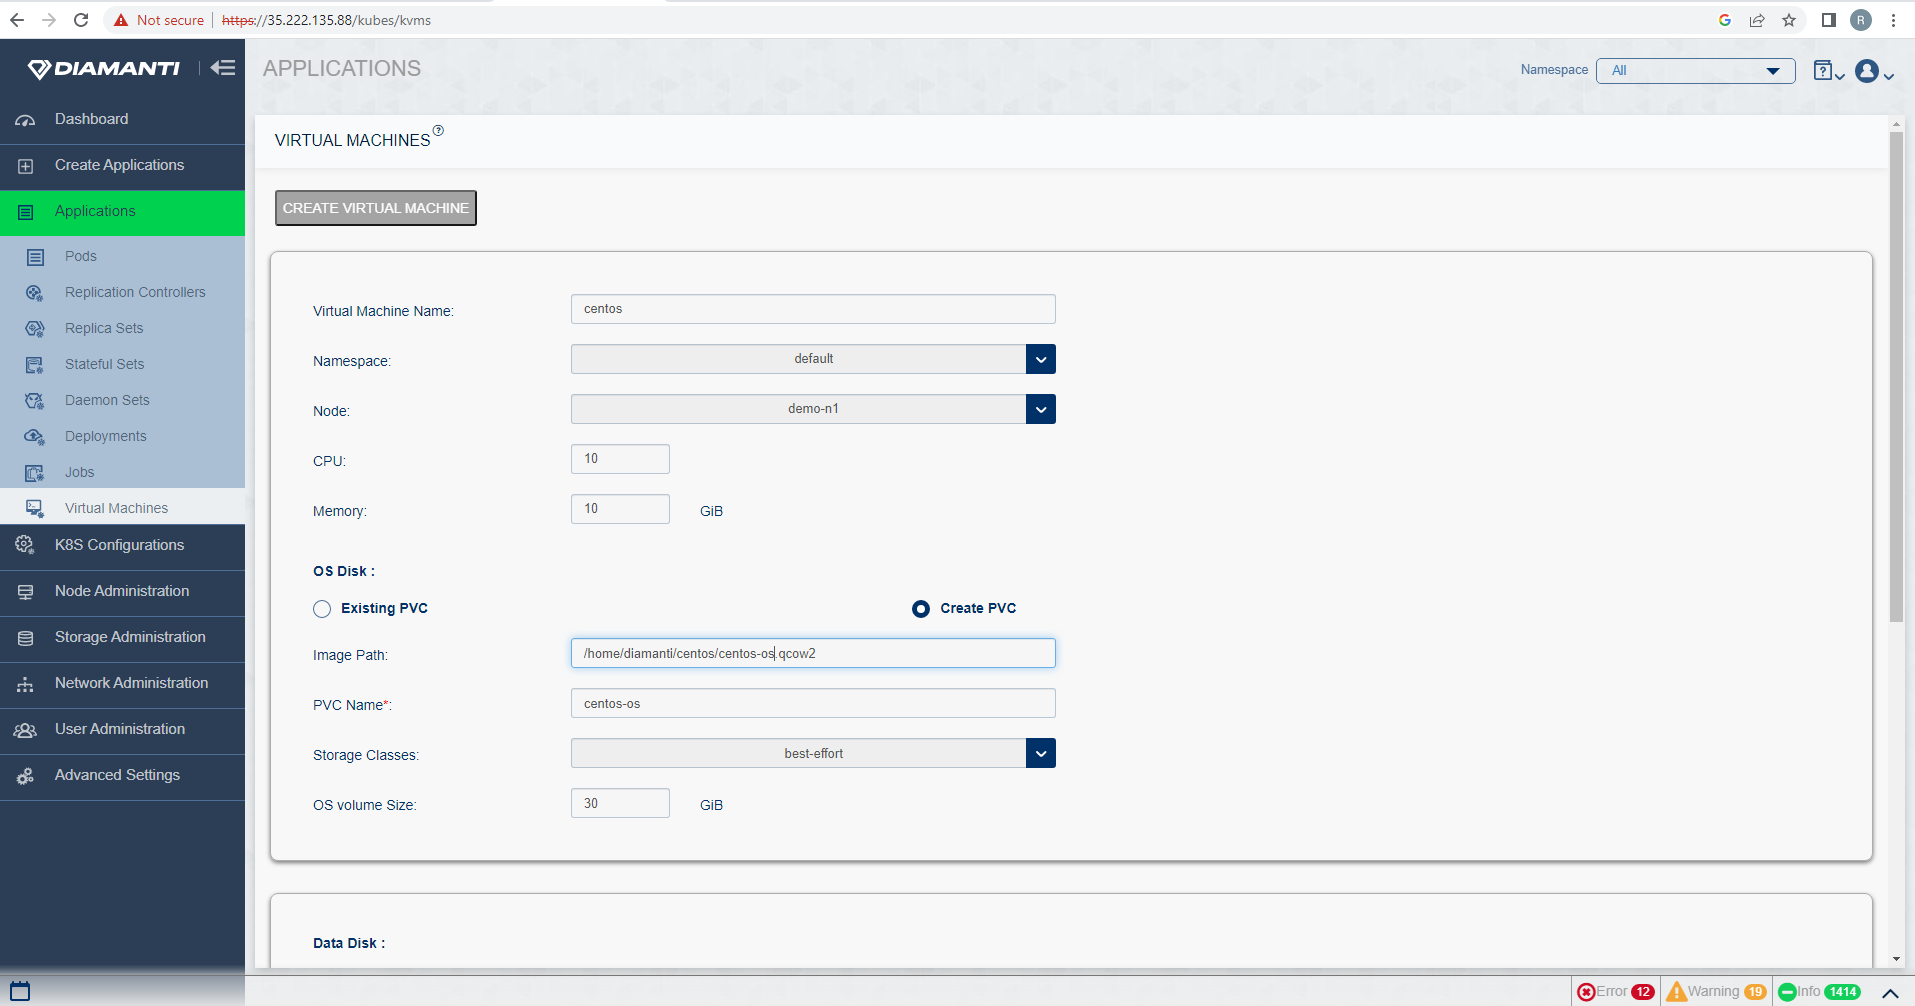
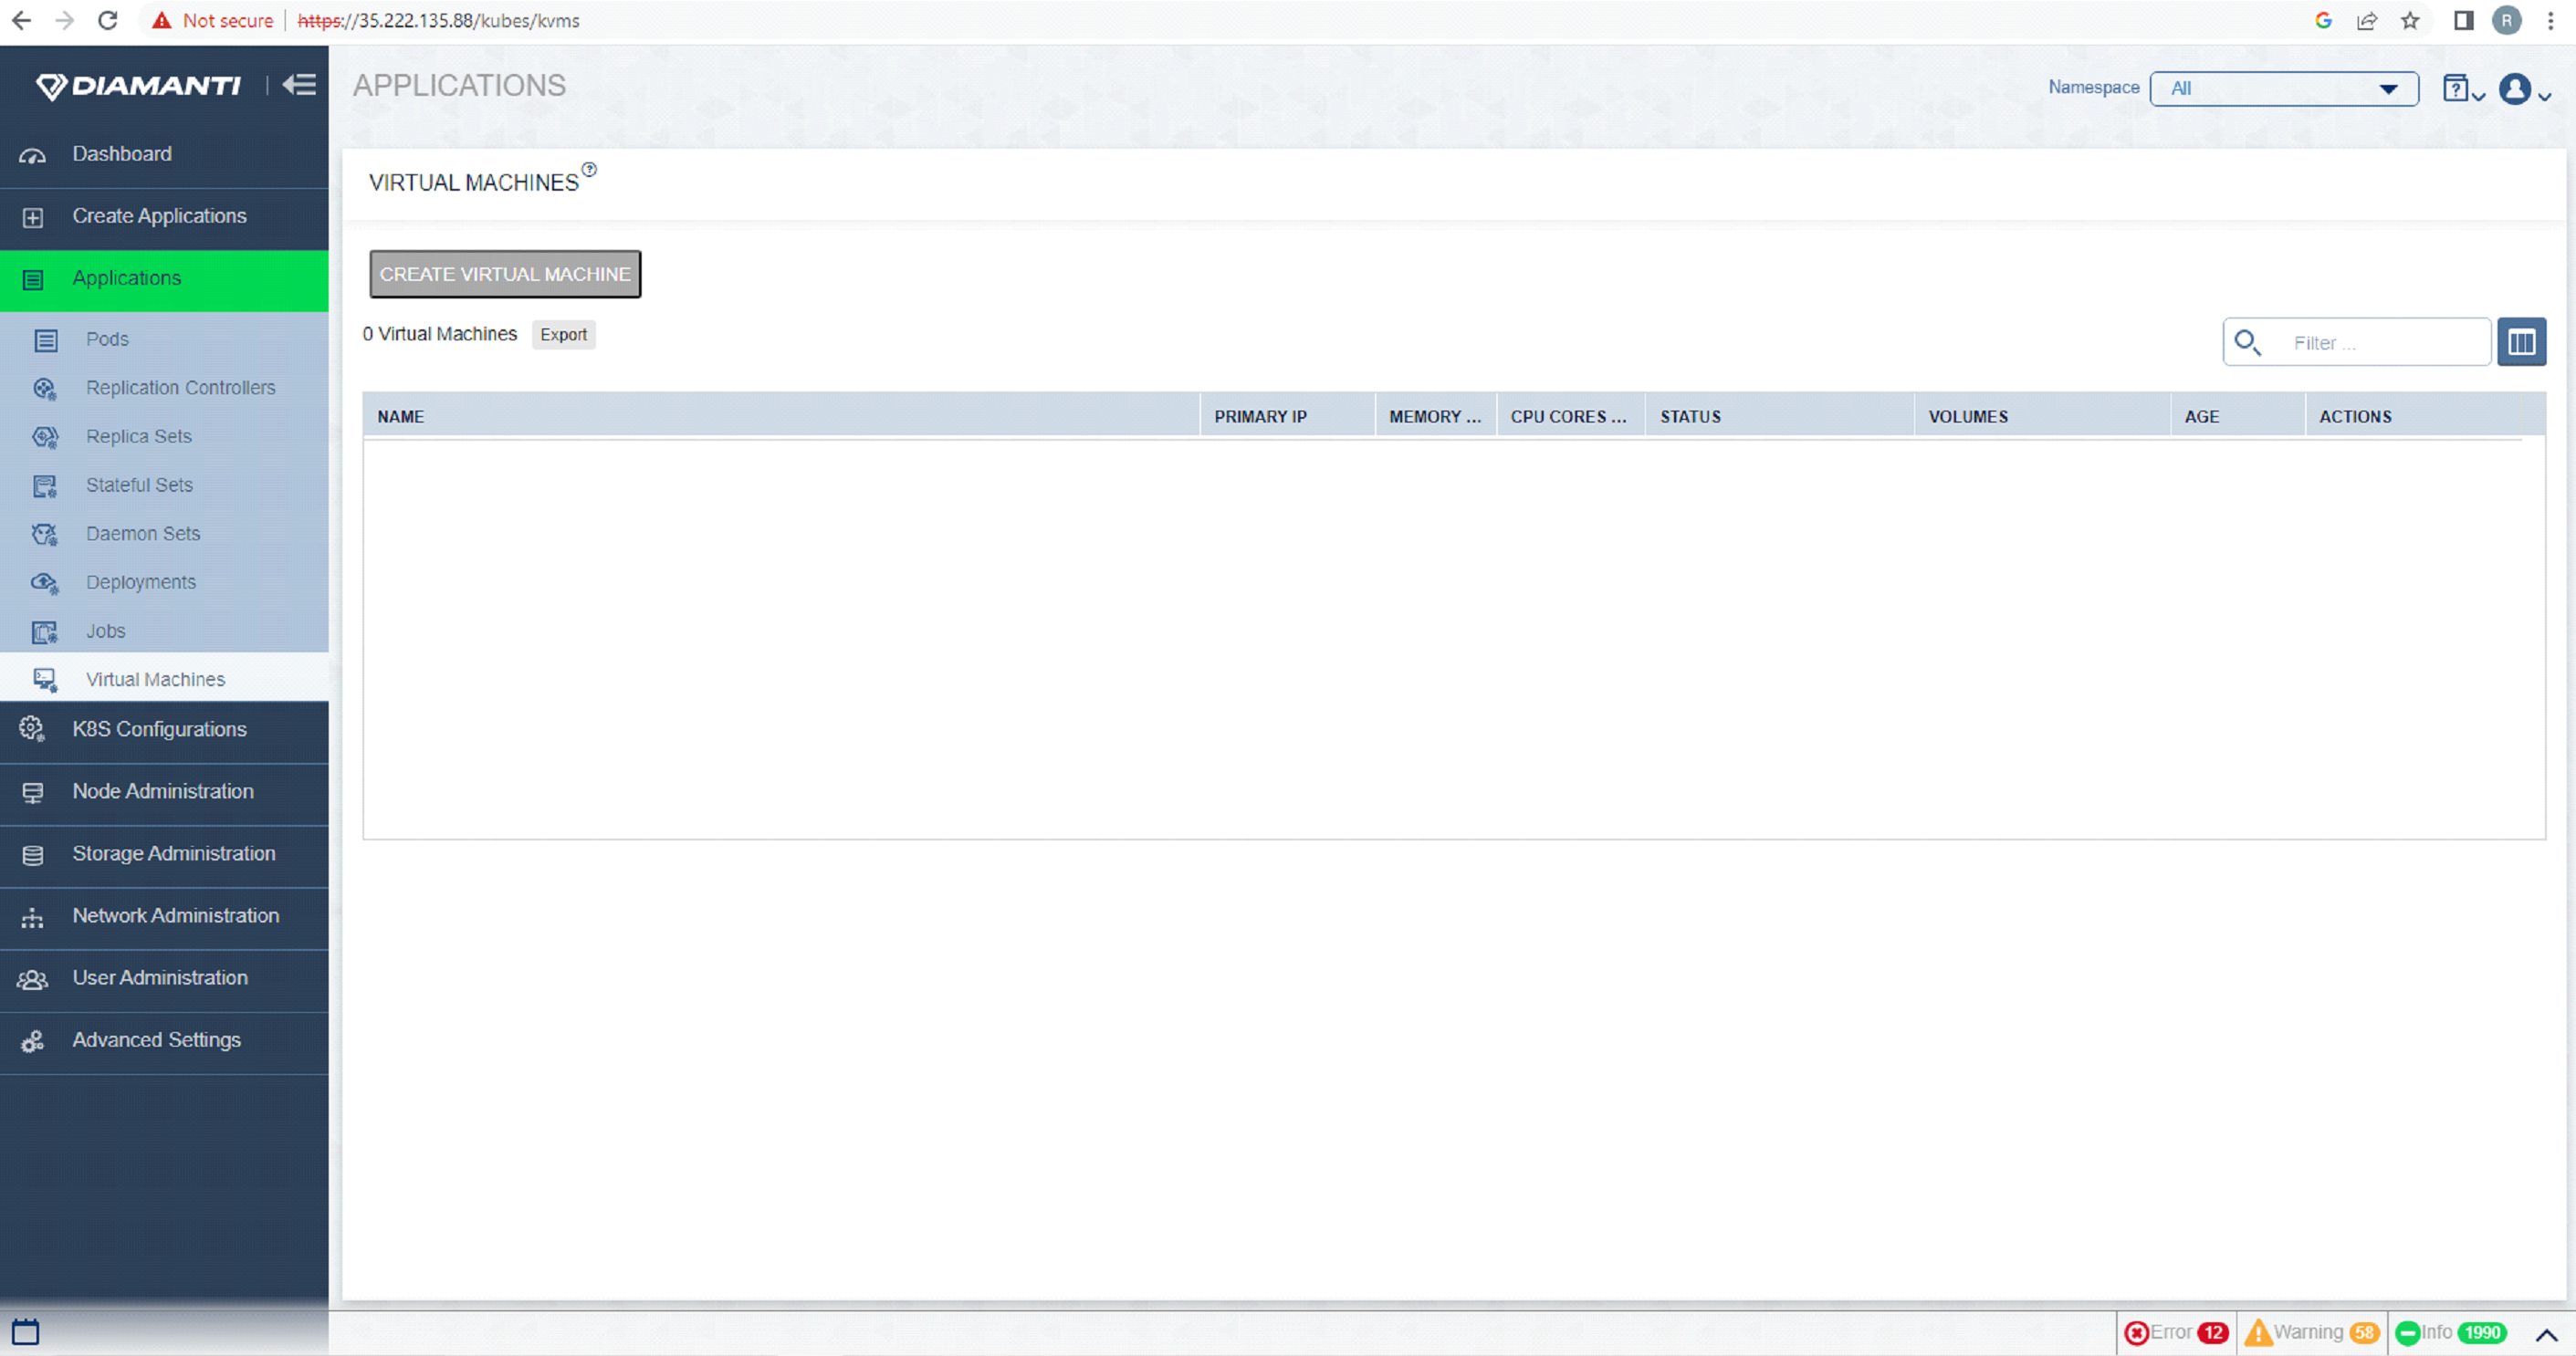
To Create Virtual Machine, Select Applications -> Virtual Machine -> Create Virtual Machines, fill all the required fields. To get the the pvc size please refer section Calculate the size of pvc to be uploaded
Note
In a VM with multiple disks and mirroring enabled, all the plexes of all the disks may not be created on the same node. When you move a virtual machine from one node to another, some disk plexes will be attached remotely because not all disks will be on the new node. As the plexes cannot be attached remotely, we need to use selectors in storage classes and add them as labels on nodes where plexes should be created to enforce that all plexes of all disks are created on the same node. Navigate to Storage Administration->Storage Classes to create a storage class to specify selectors as parameter.
To upload/add additional disks Select Data Disk-> Create PVC, fill the required fields.
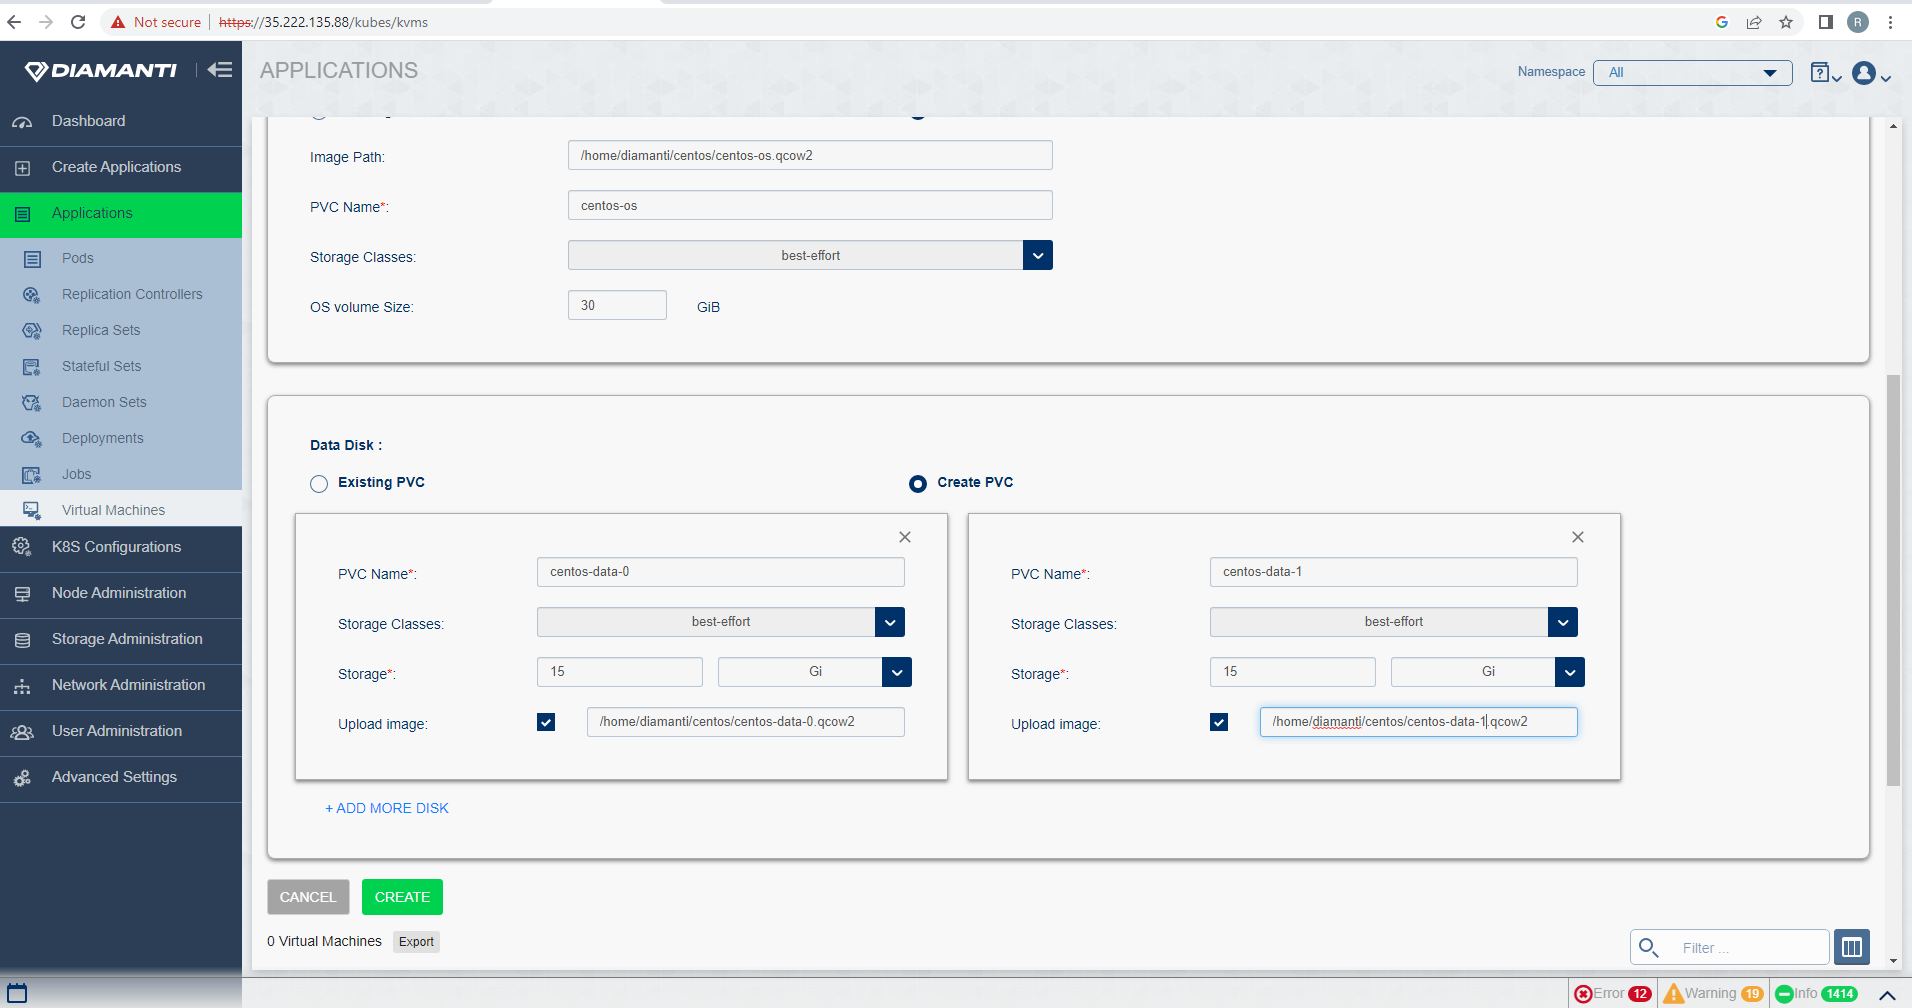
Once all fields are filled then select Create Option to create Virtual Machine. After creation, VM is listed, and Status will be in ‘Upload in-progress’. Once upload is done, status changes to Stopped.

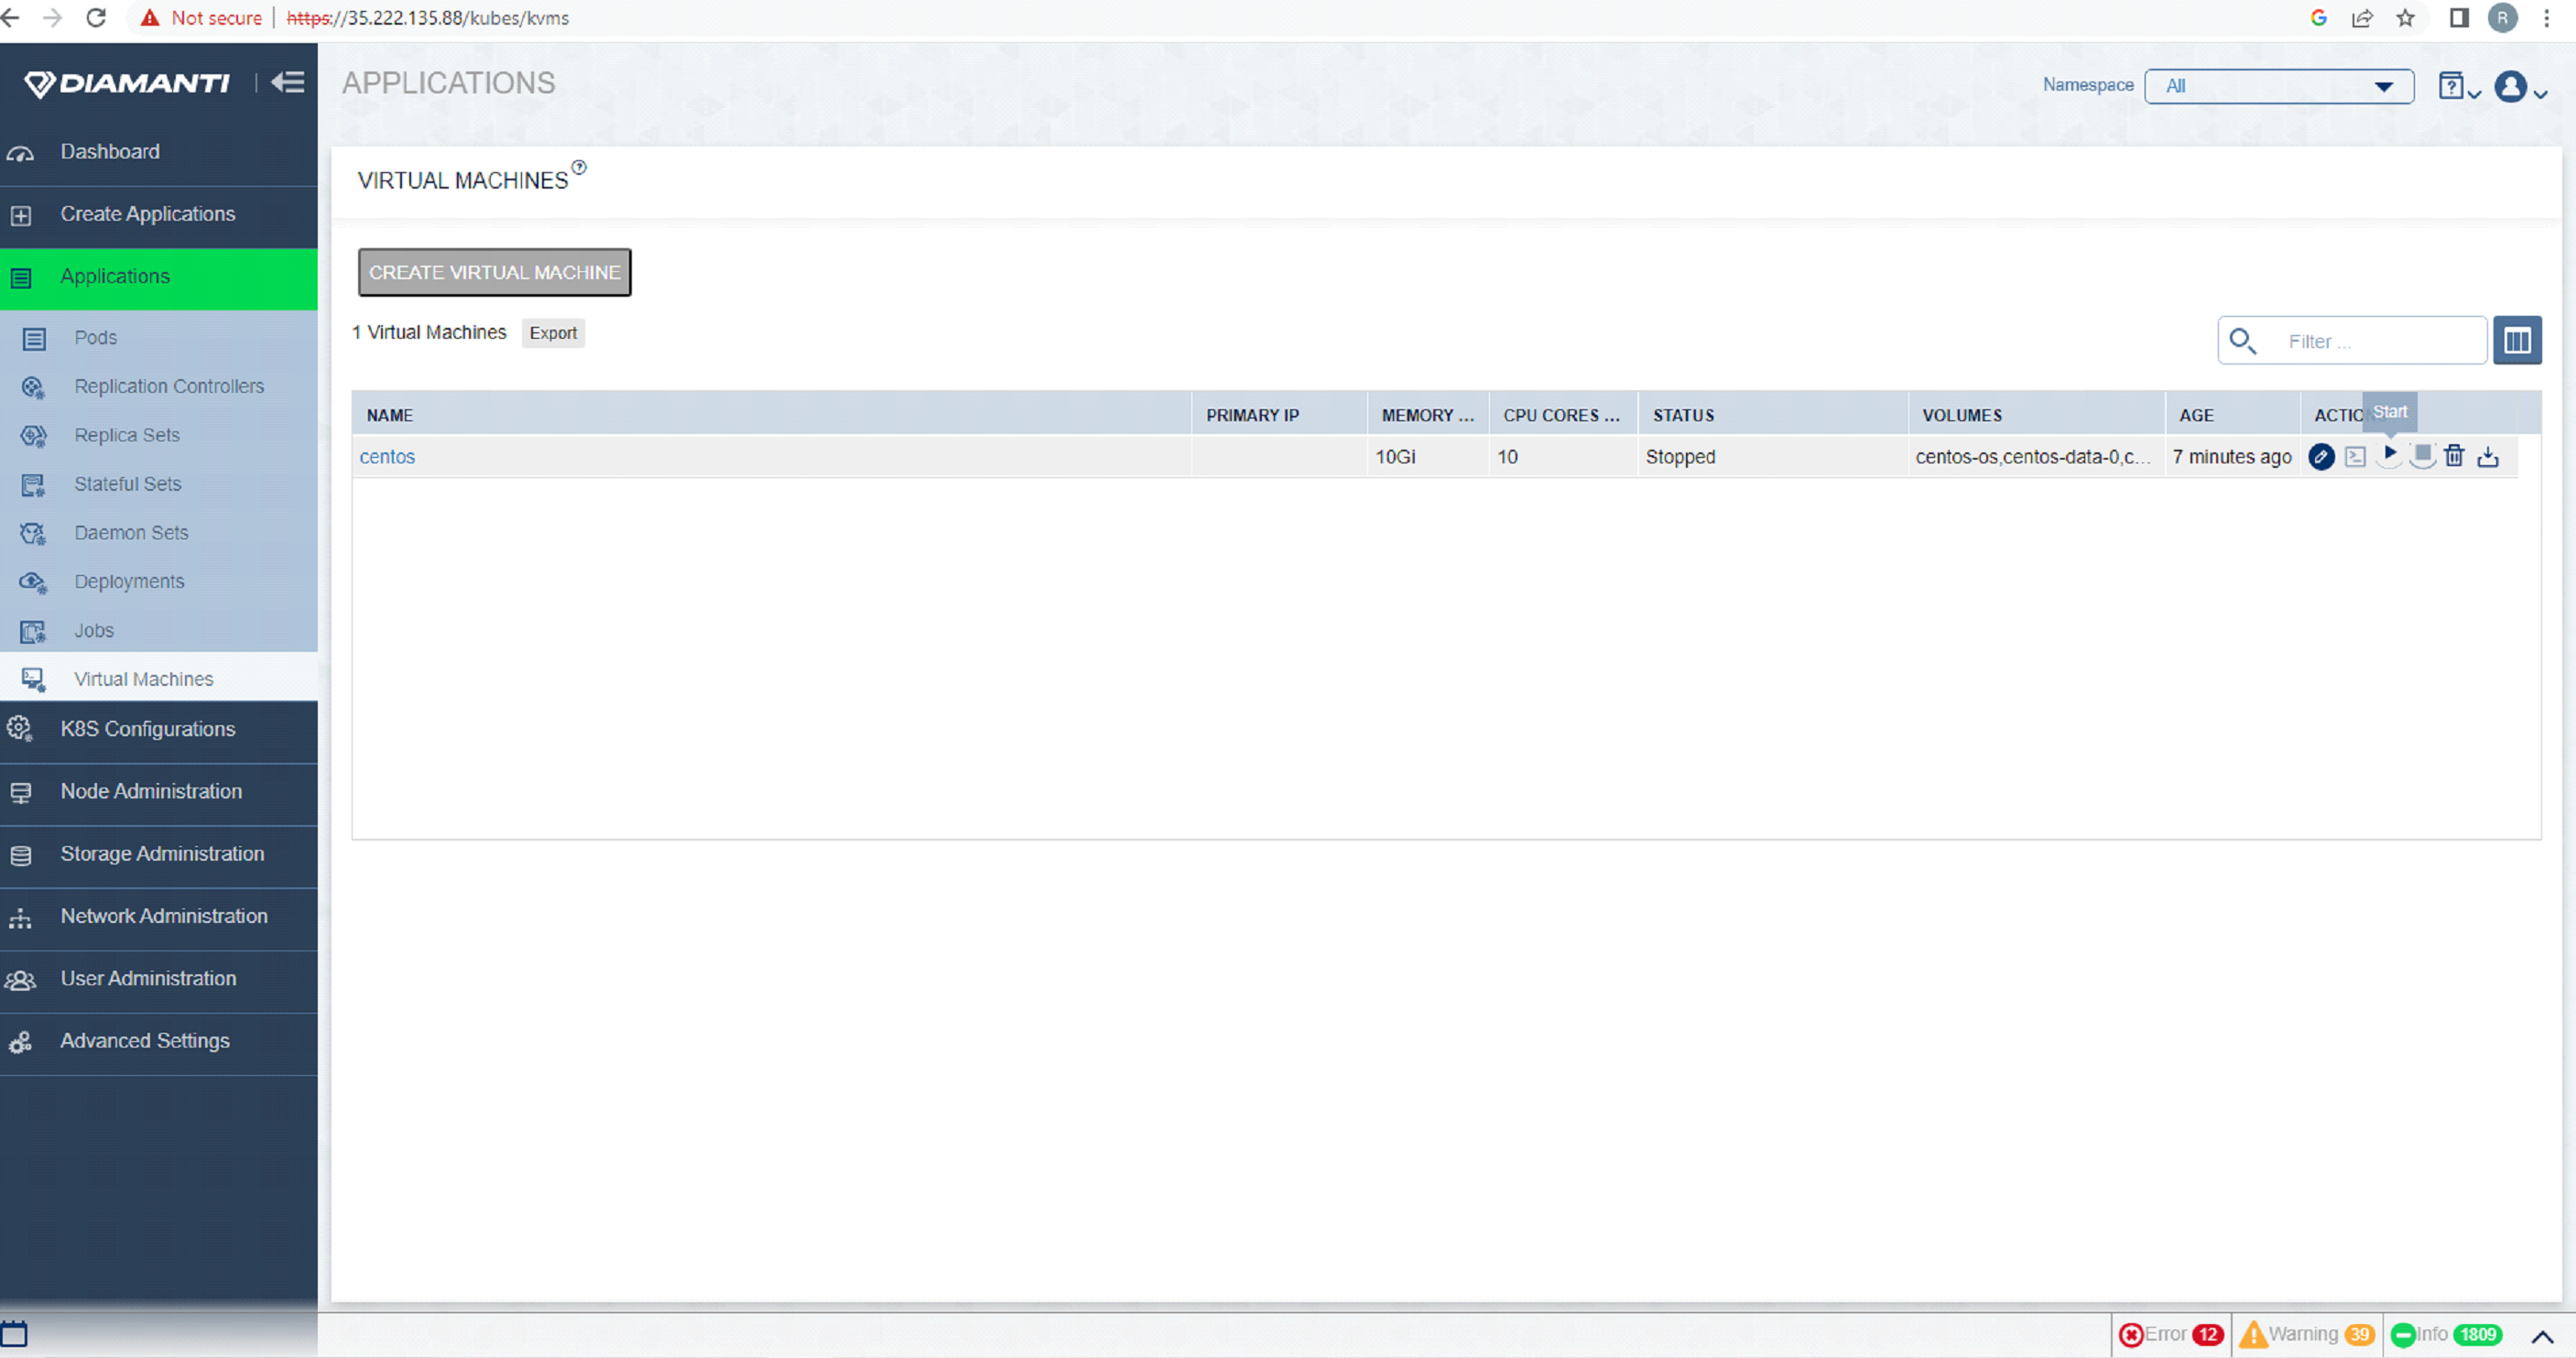
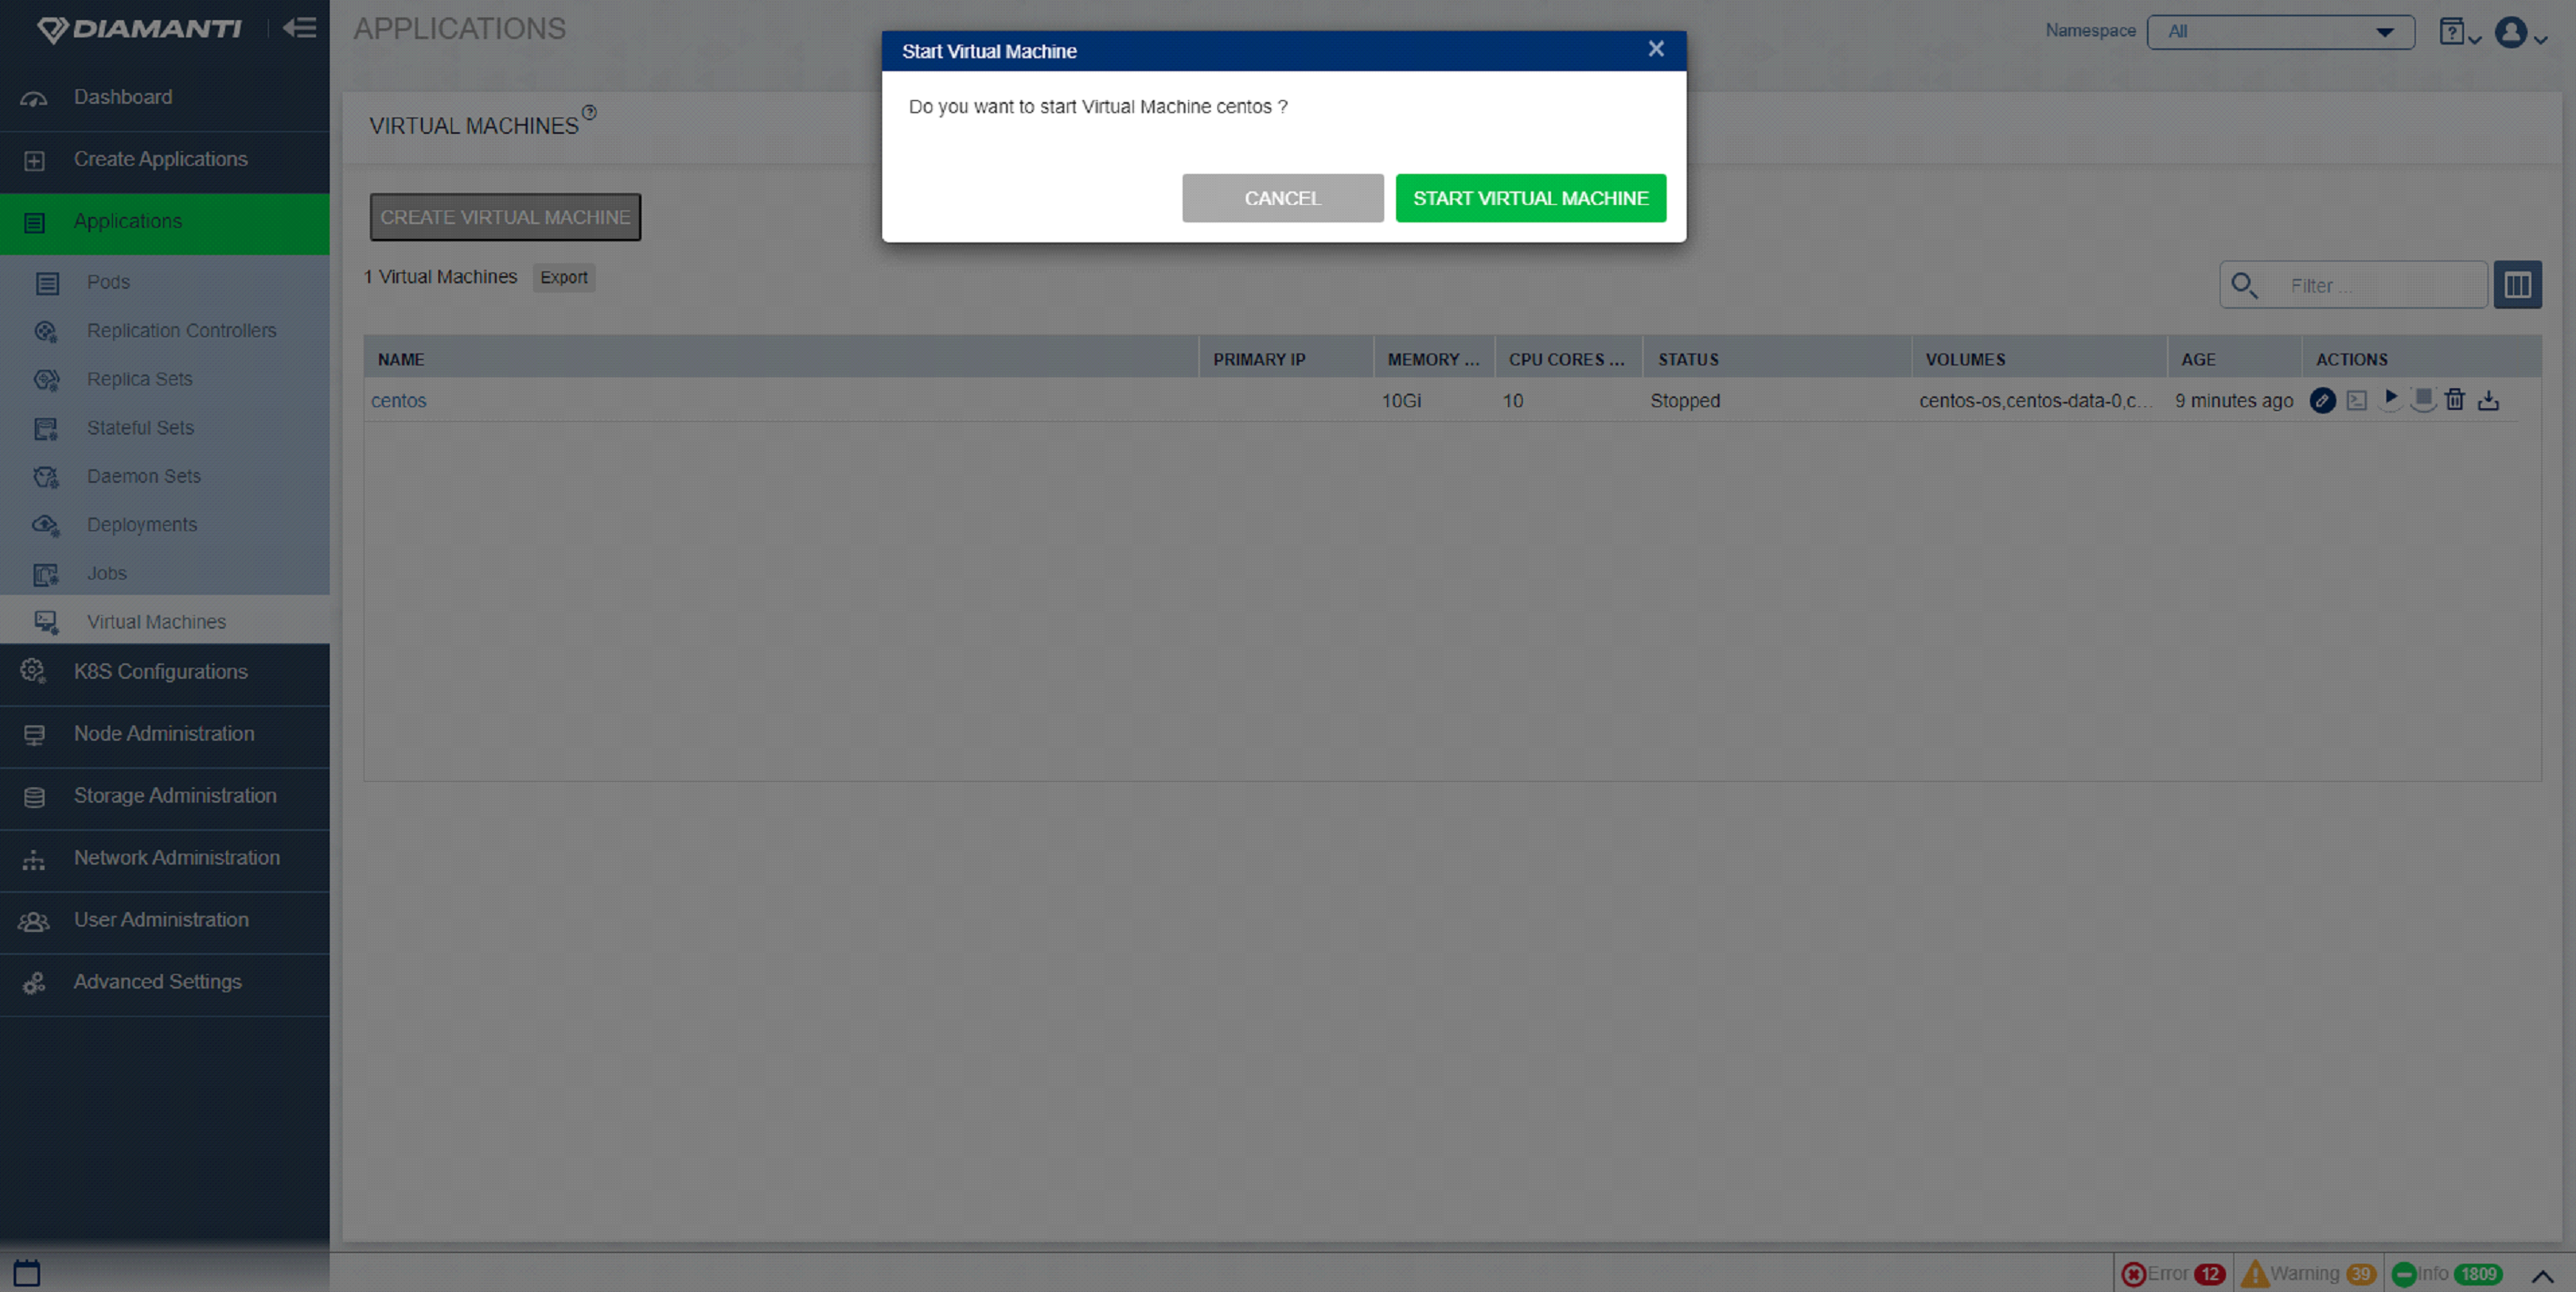
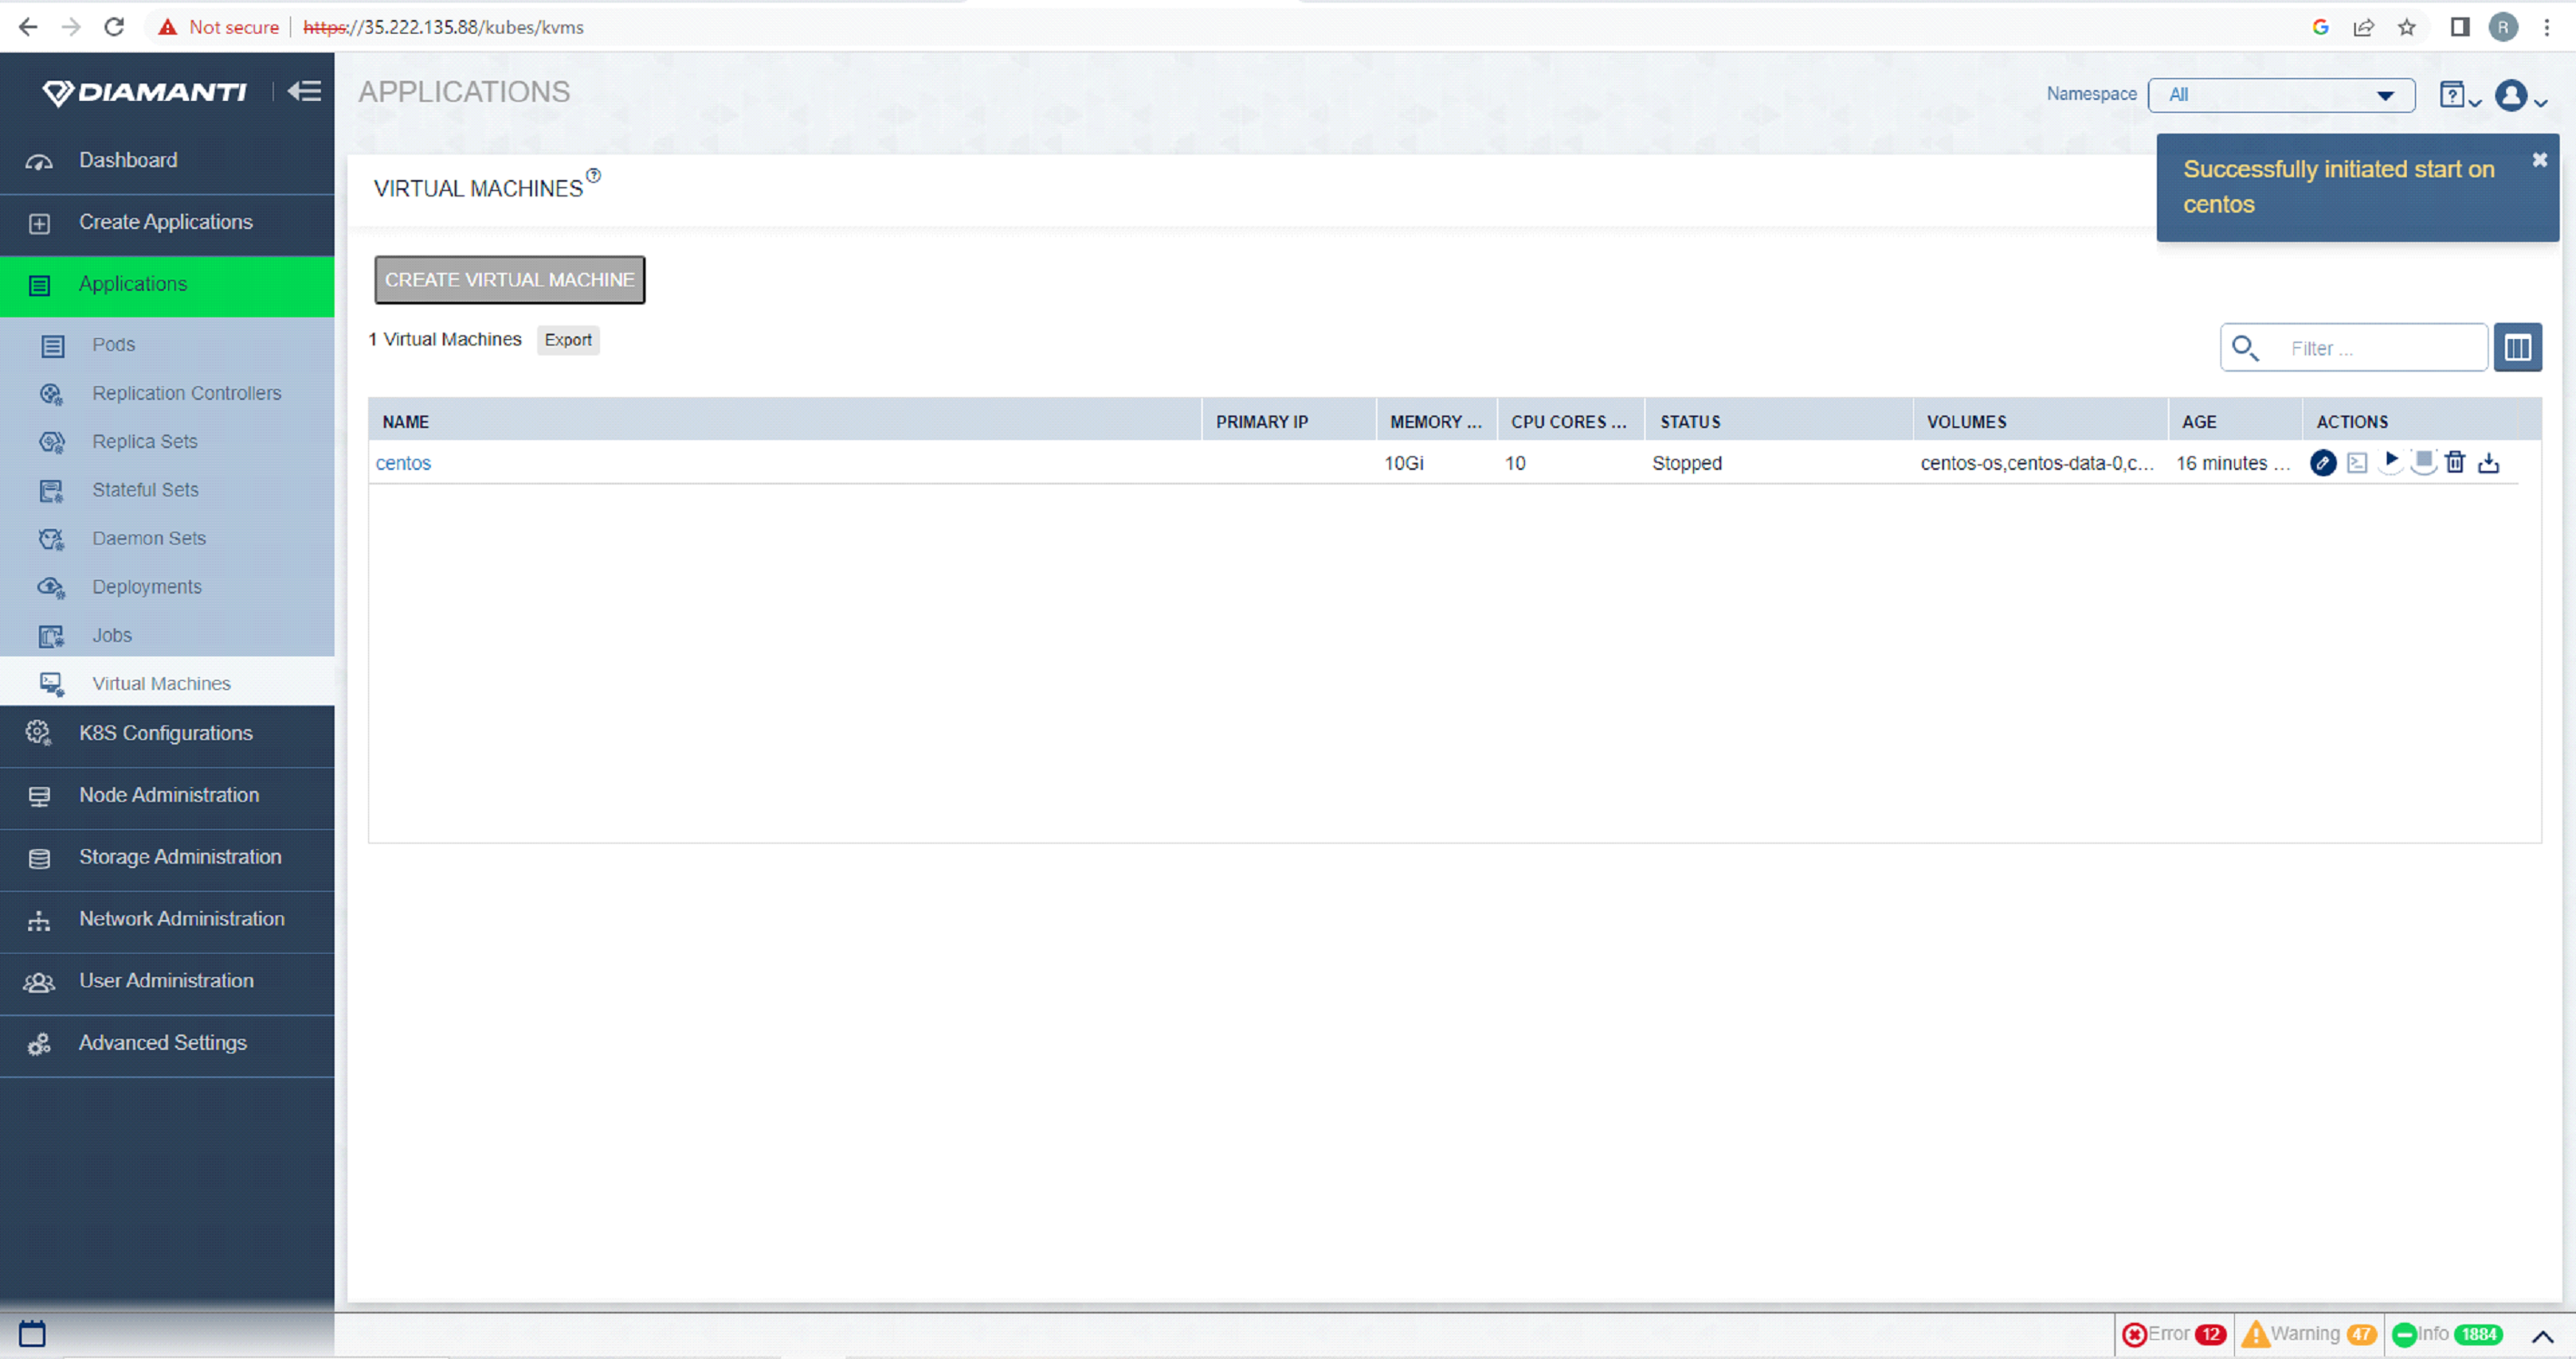
To start the VM, first list the VMs by selecting Applications and then Virtual Machine Administration, select start option in Actions tab of the VM that needs to be started.
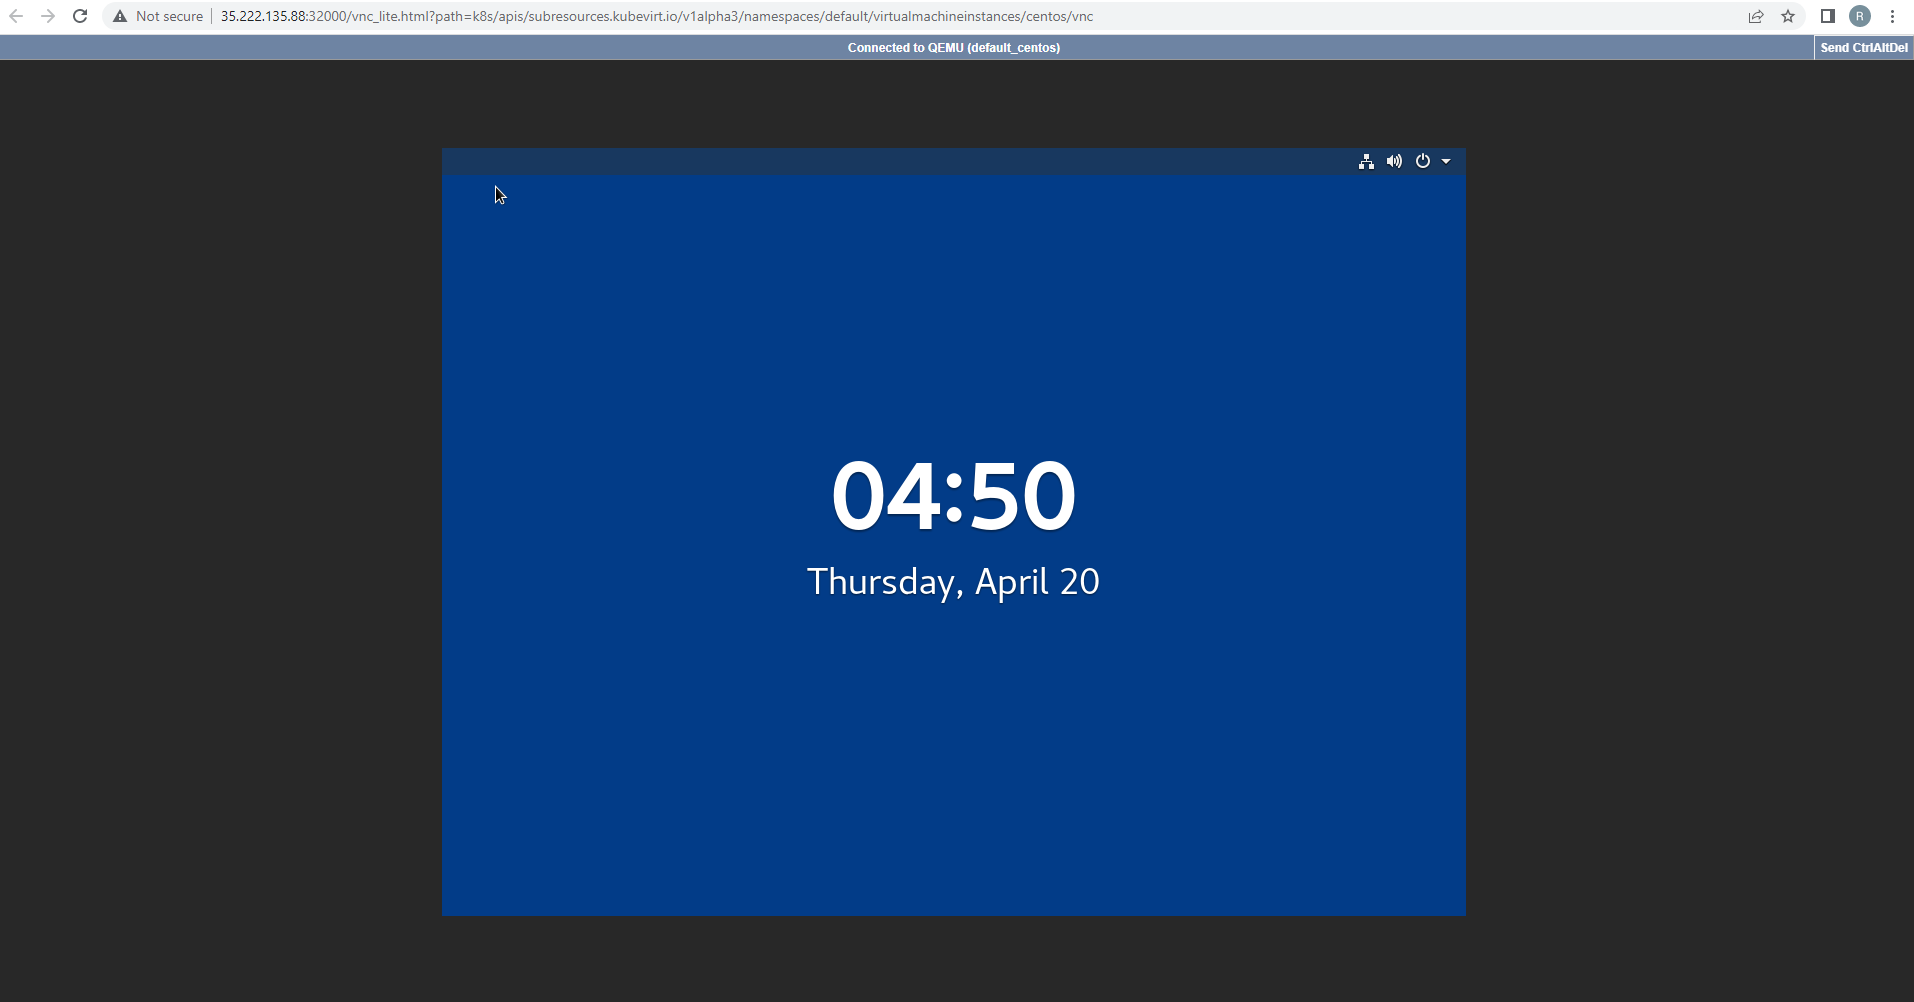
To access the VM console, first list the VMs by selecting Applications and then Virtual Machine Administration, select open terminal in Actions tab of the VM. In Another tab in browser you would see the terminal.

The VM console opens in a new tab of the browser.
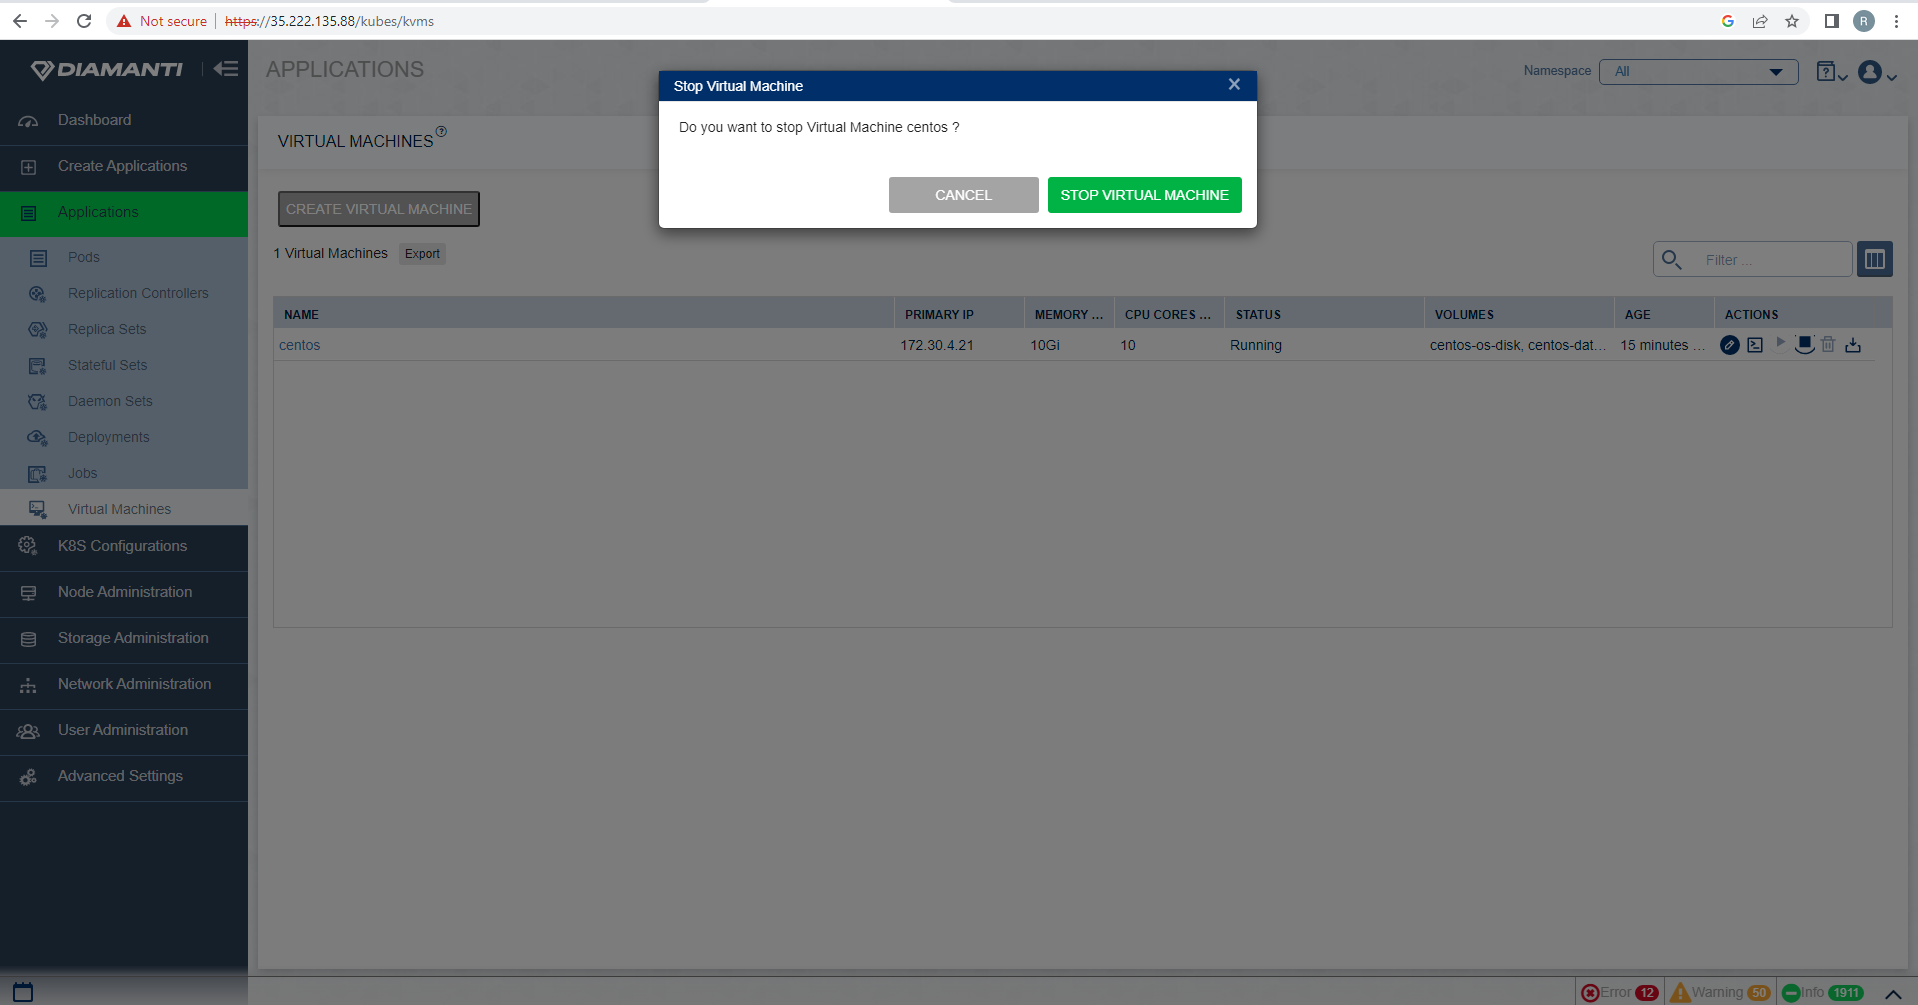
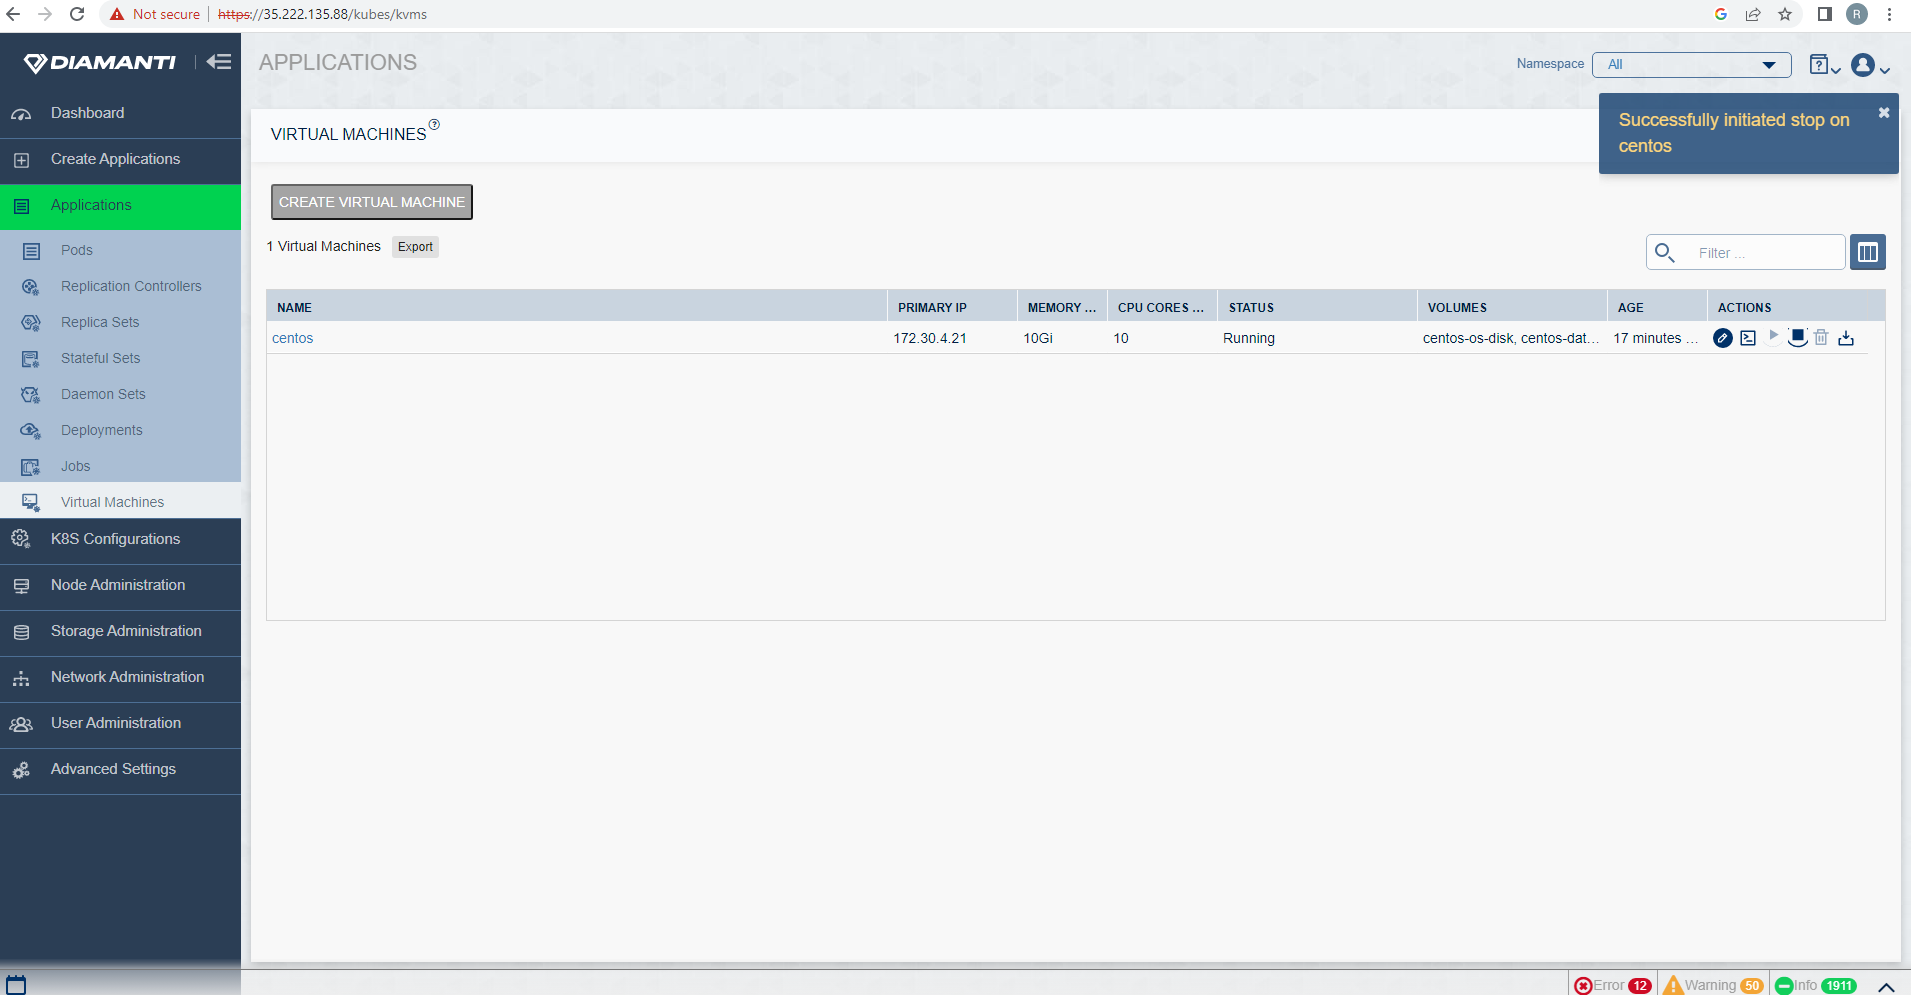
To stop the VM, first list the VMs by selecting Applications and then Virtual Machine Administration, select stop option in Actions tab of the VM that needs to be stopped.

Confirm the operation by selecting Stop Virtual Machine.
The status of the Stop operation is displayed at the top right corner.
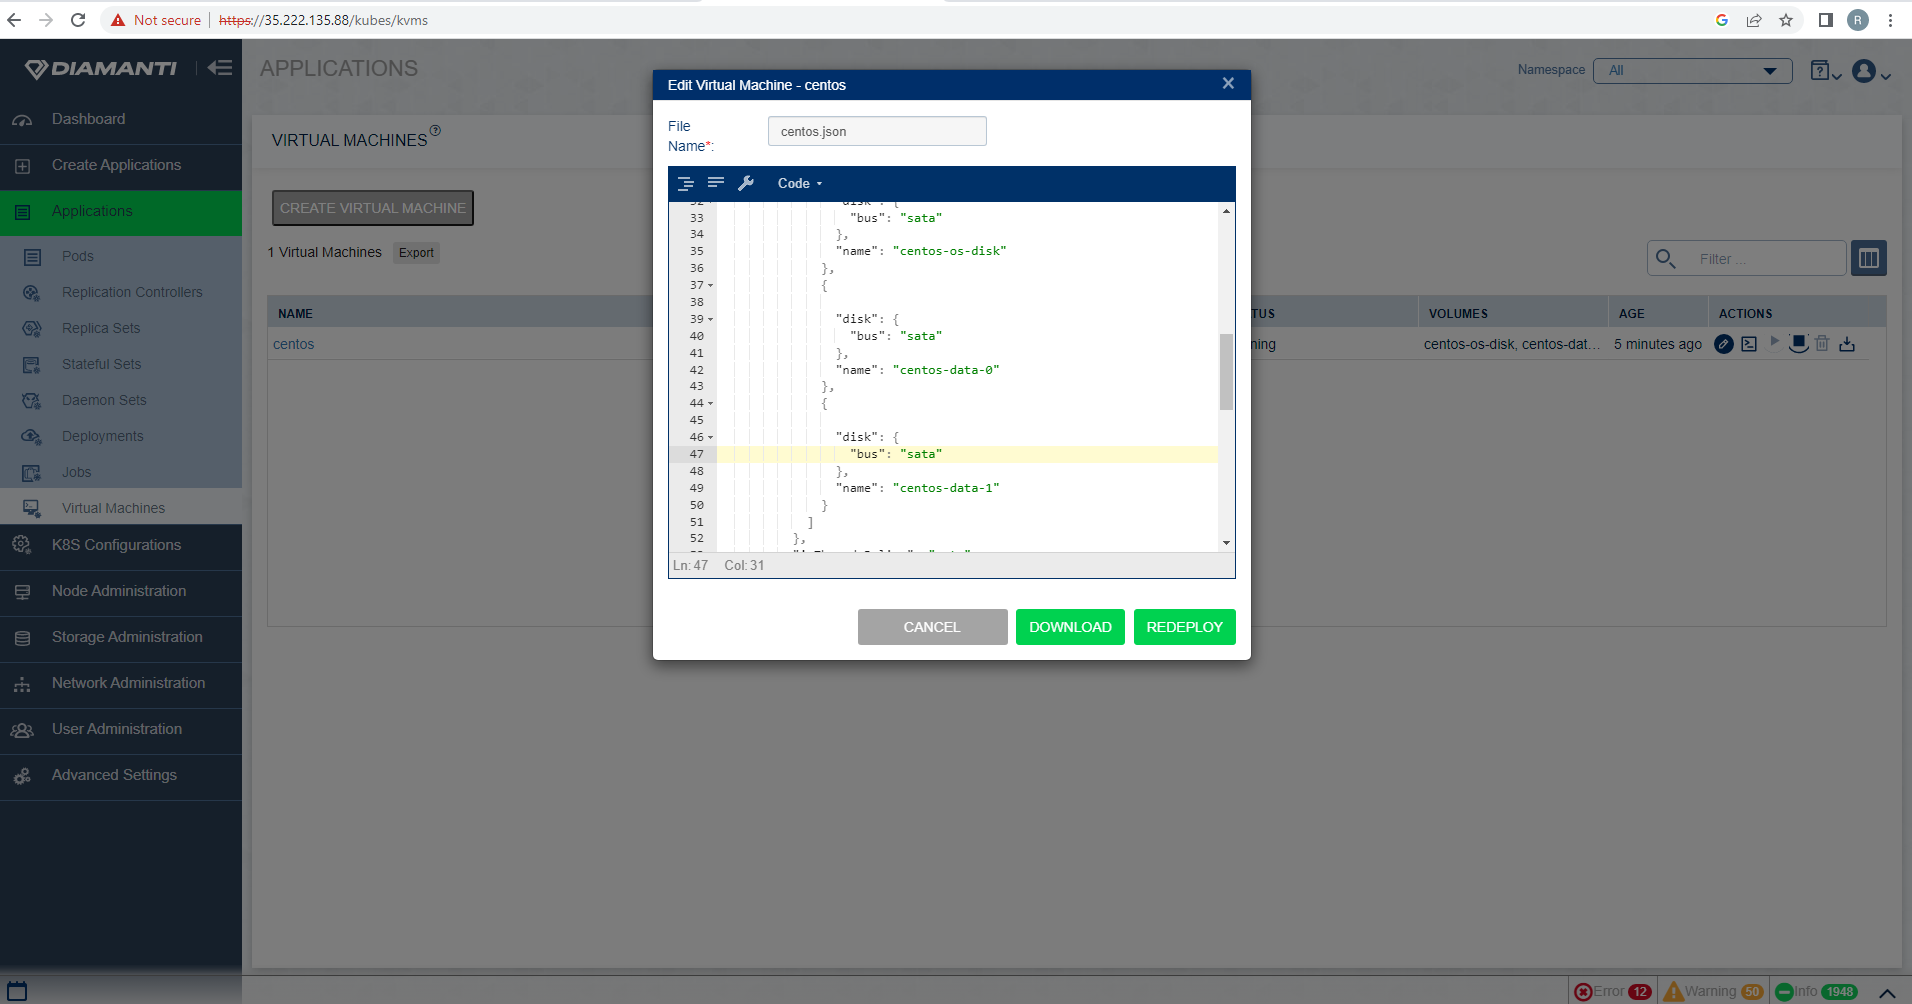
To Edit the VM spec, first list the VMs by selecting Applications and then Virtual Machine Administration, select Edit option in Actions tab of the VM that needs to be edited

Edit the required fields and select REDEPLOY option, it will redeploy the Virtual Machine.
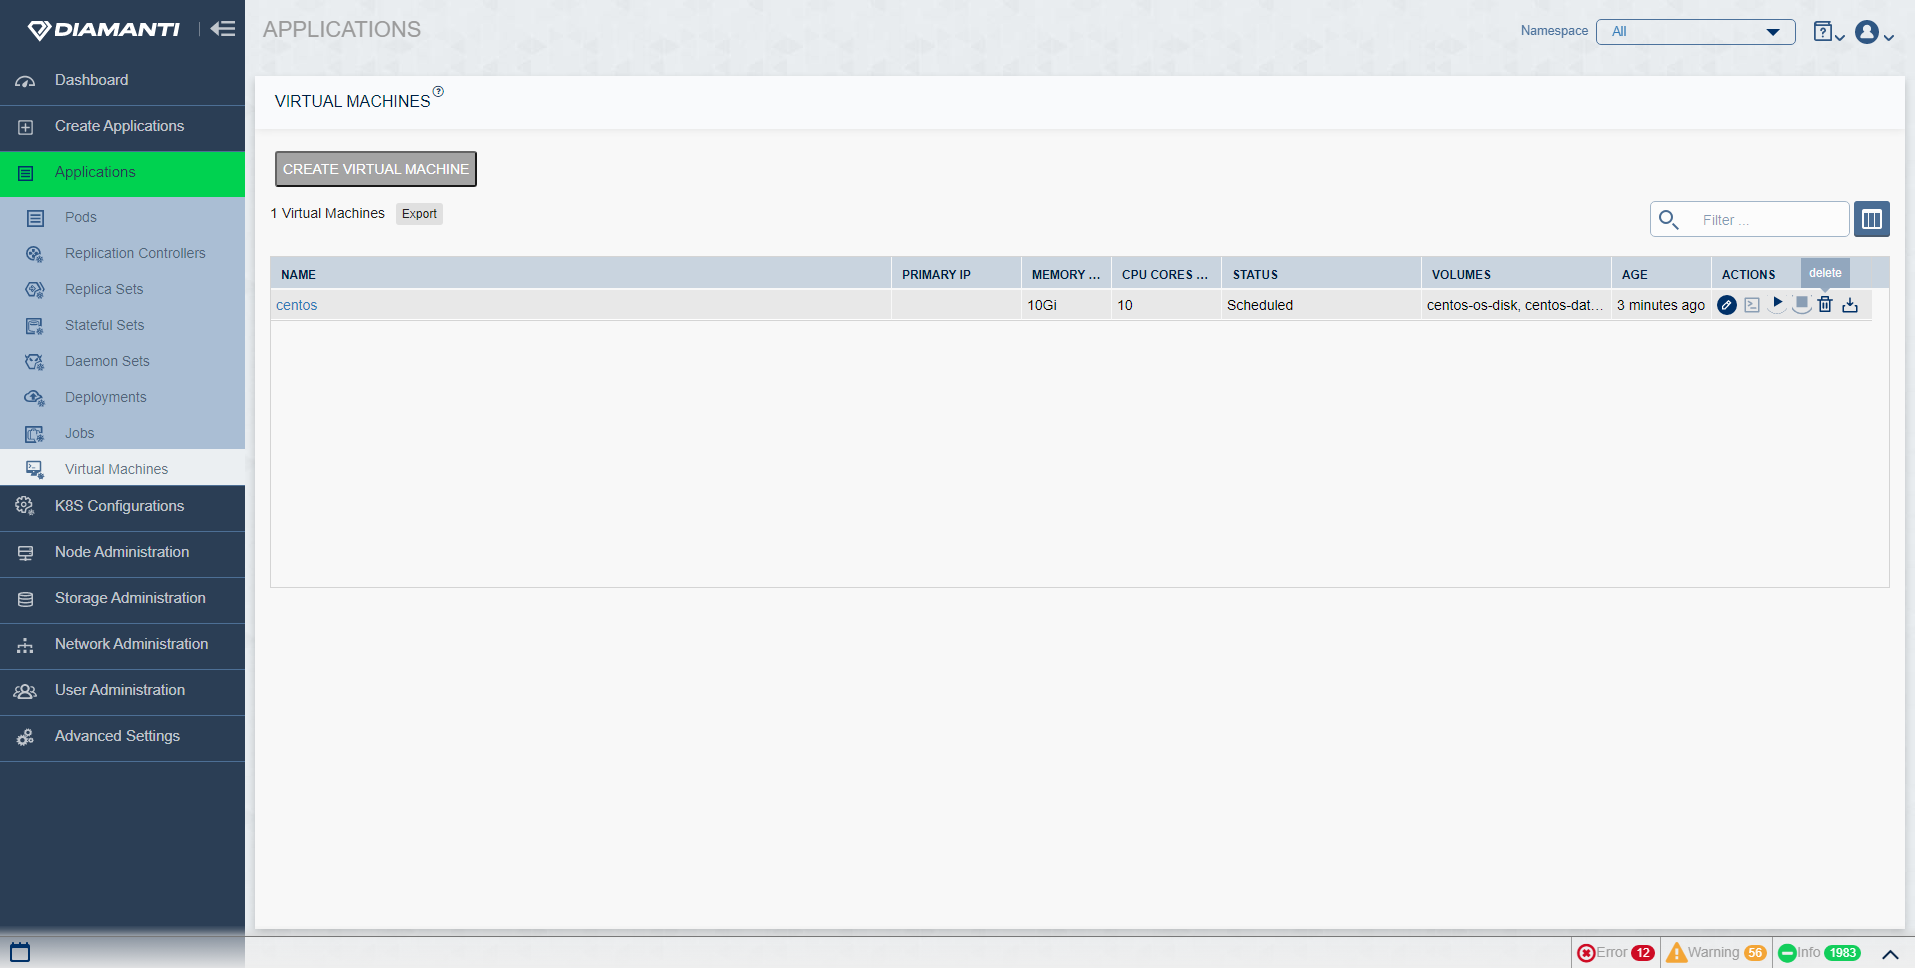
To Delete the VM, first list the VMs by selecting Applications and then Virtual Machine Administration, select Delete option in Actions tab of the VM that needs to be deleted.
Confirm the deletion.
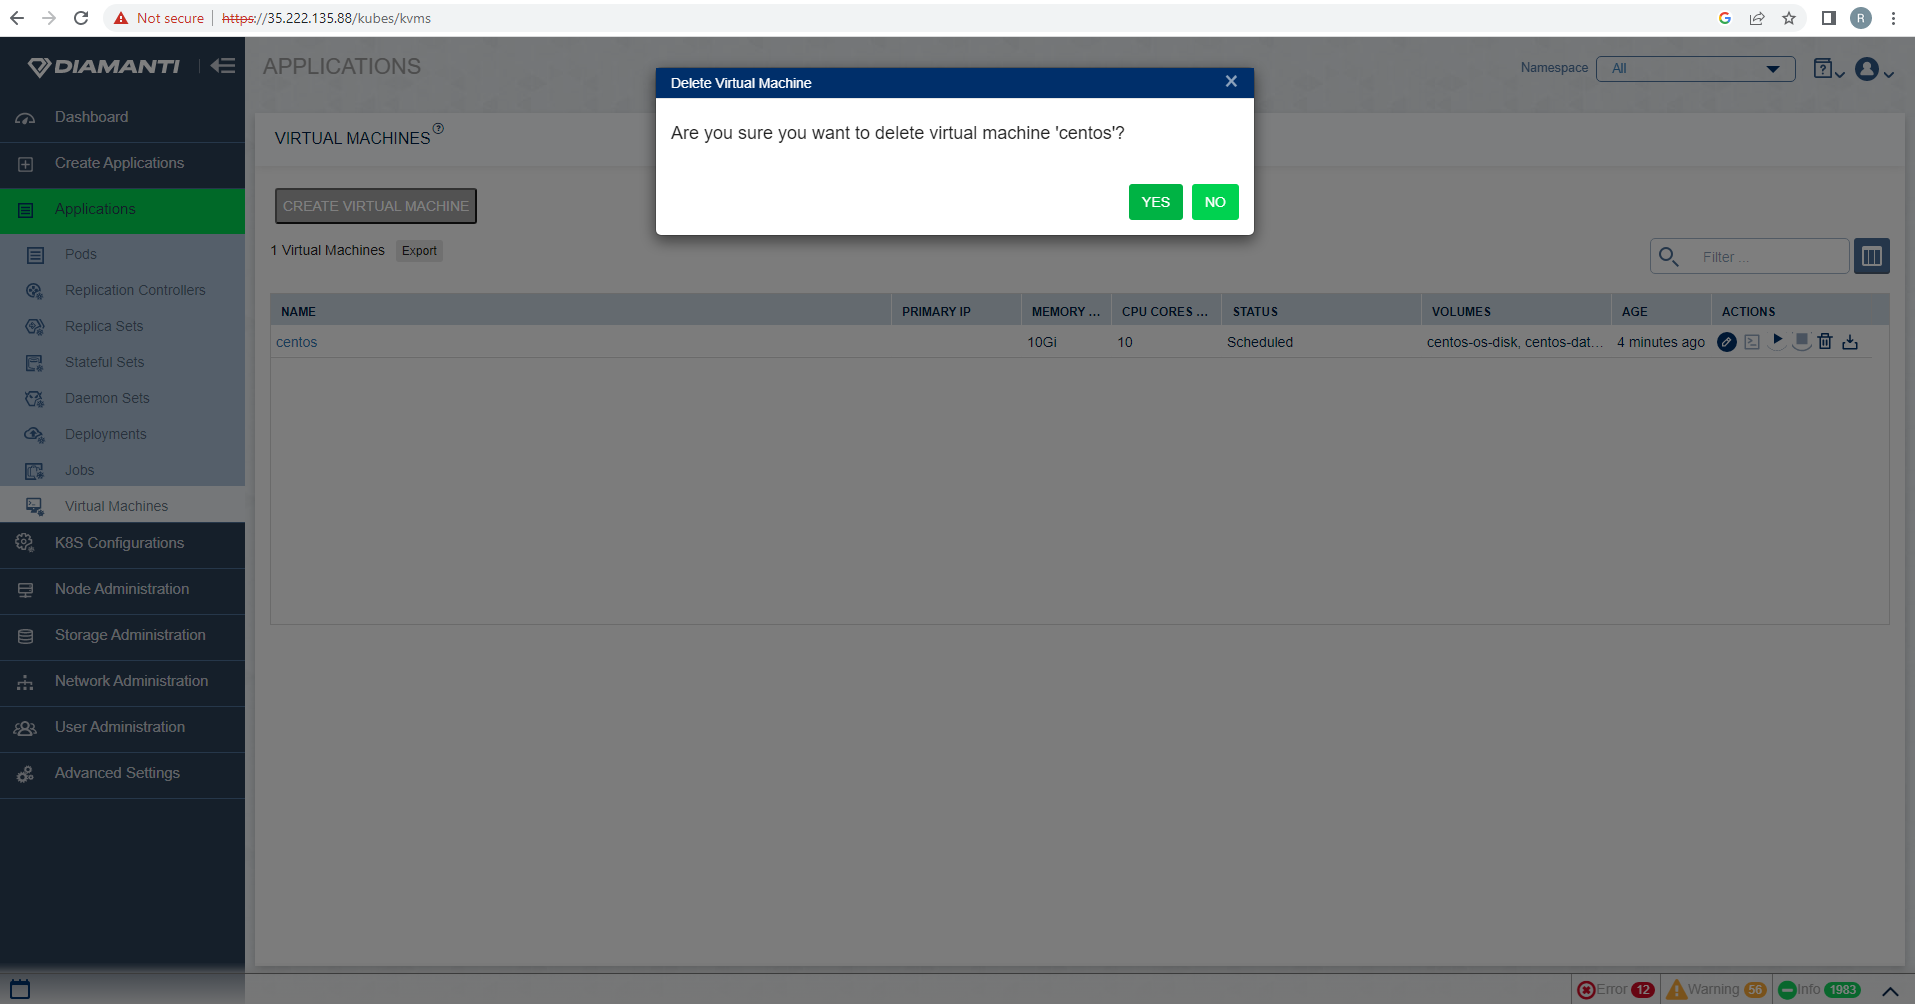
The status of the operation is displayed in the top right corner.

The deletion can be verified in the list of VMs.
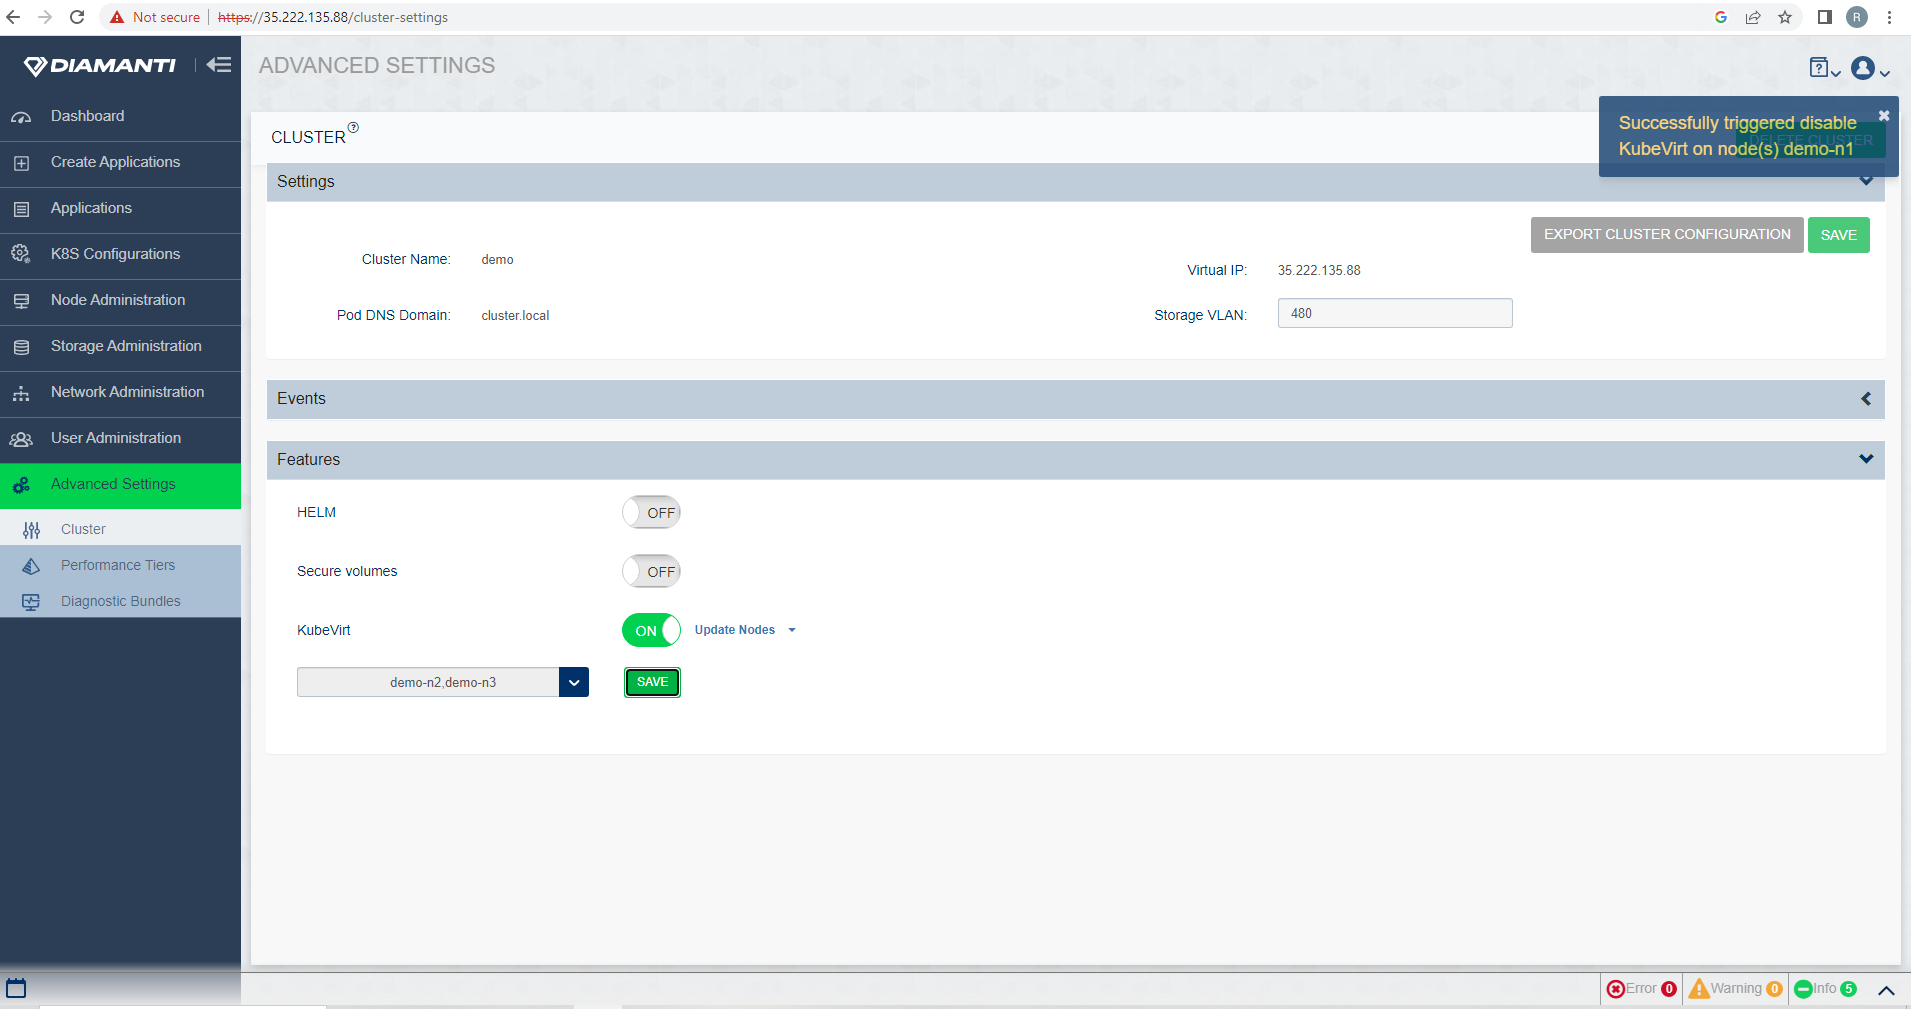
To Remove nodes from hosting Kubevirt VM’s, select Advanced Setting -> Features -> Kubevirt -> Update nodes and then from the drop-down list deselect the nodes you want to remove from the list, select Save to remove nodes deselected.
The status of the operation is displayed in the top right corner.
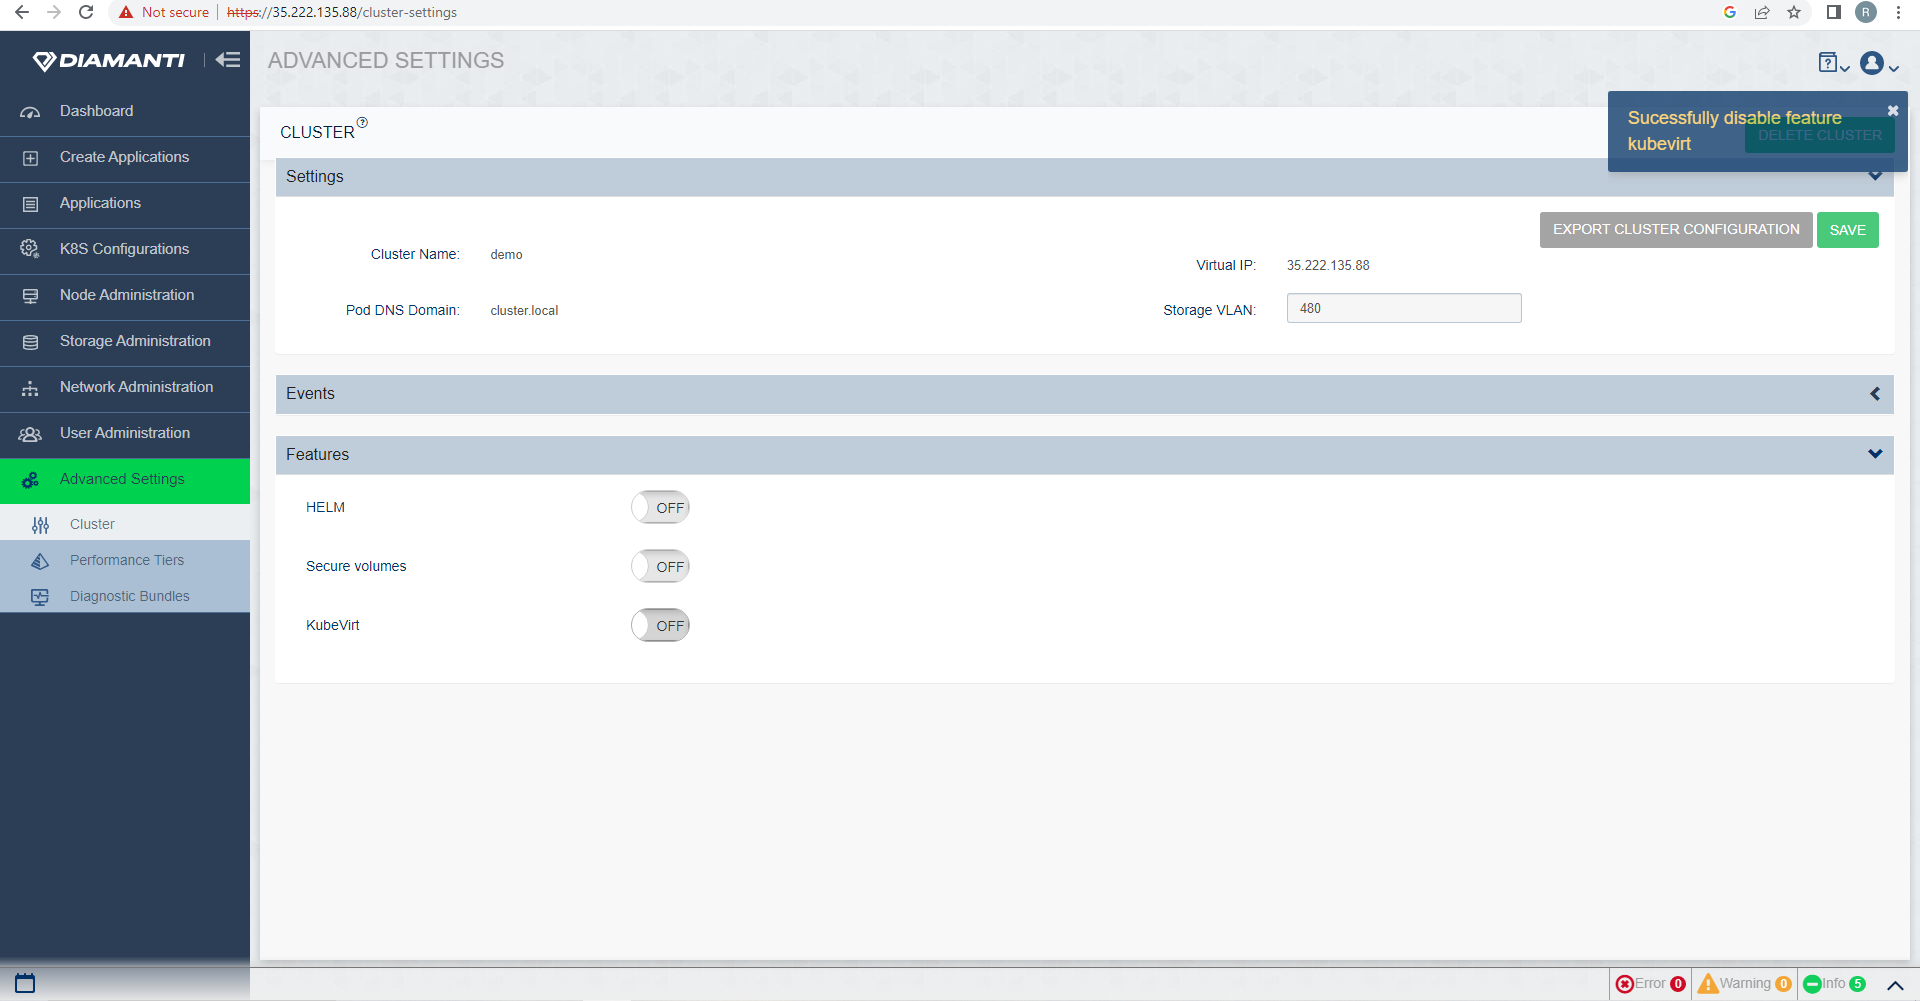
To Disable KubeVirt, go to Advanced Settings and under Features, deselect KubeVirt.
To disable Kubevirt, all nodes must be removed from the Kubevirt feature.
Calculate the size of pvc to be uploaded
Following command gives information about qcow image.
$ qemu-img info centos-os.qcow2

image: centos-os.qcow2
file format: qcow2
virtual size: 40G (42949672960 bytes)
disk size: 17G
cluster_size: 65536
Format specific information:
compat: 1.1
lazy refcounts: false
Note
Virtual size is actual size of disk and add 10% overhead above it and use that size for pvc, so in our example it would be around 45G.
Kubevirt VM installation using ISO
To enable kubevirt and schedule kubevirt VMs on nodes, refer VMs on Kubernetes (kubevirt).
To install the OS on one of the cluster nodes, copy the ISO and upload it to a PVC. Refer to step 5 of Using KubeVirt CLI.
For example, the ISO uploaded on the PVC could be named win2019-iso on Windows and linux-iso on Linux.
As soon as the upload is complete, log in to one of the nodes and use the spec file for Windows and Linux dynamic endpoint configuration from the /usr/share/diamanti/manifests/examples/kubevirt-vm-spec/windows-iso-dynamic-endpoint.yaml file. The same specification can also be used for Linux and Windows.
To change the name and number of disks in the VM, edit the specification copied in step 3. In order to install the OS, we need at least one PVC other than ISO PVC.
When ISOs are uploaded, PVC is used to create a CD-ROM. Change the disc name from win2019-os to win2019-iso/linux-iso as it is our pvc name. It shows that the boot order is 2, which indicates that this is the second bootable disk. Since there is no content on the hard drive at startup, it will boot from a CDROM.
- cdrom:
  bus: sata
bootOrder: 2
name: cdromiso
 volumes:
- name: cdromiso
  persistentVolumeClaim:
    claimName: win2019-os
- After Edit:
- name: cdromiso
    persistentVolumeClaim:
      claimName: win2019-iso
There are multiple disks in this installation, but with only one hard drive you can still use it as the 1st boot device. When bios first finds this device it will switch to CDROM, however once the OS is installed on this device, it will boot directly from this device after reboot.
- disk:
  bus: virtio
  name: harddrive
  bootOrder: 1
- disk:
  bus: virtio
  name: harddrive2
- disk:
  bus: virtio
  name: harddrive3
As part of the Windows installation process, we will create a new CDROM called virtio-drivers, which is a container disk that contains virtio drivers for Windows. load these drivers during installation of Windows. You must load these drivers during Windows installation.
- cdrom:
        bus: sata
        readonly: true
        name: virtio-drivers

- name: virtio-drivers
           containerDisk:
                  image: kubevirt/virtio-container-disk
                  imagePullPolicy: IfNotPresent
Note
For Windows VMs, virtio-container-disk is used to install virtio driver which is mounted as a cdrom on the VM. For more information, see How to obtain virtio drivers?
For Linux VMs, virtio drivers are already installed.
Use the kubectl create -f windows-iso-dynamic-endpoint.yaml command to create a virtual machine based on the modified spec.
Start the Virtual machine following step 9 of Using KubeVirt CLI.
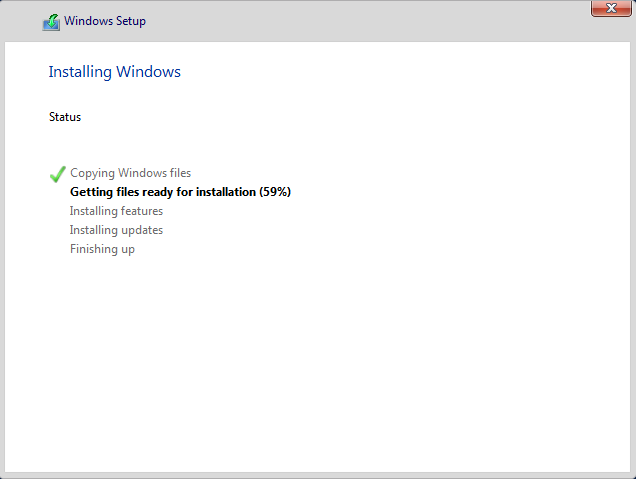
Launch a GUI console of the VM for Windows or Linux installation. In order to access the VM console, select Applications -> Virtual Machine Administration, select open terminal in Actions tab of the VM, and the console will appear in another tab in your browser..
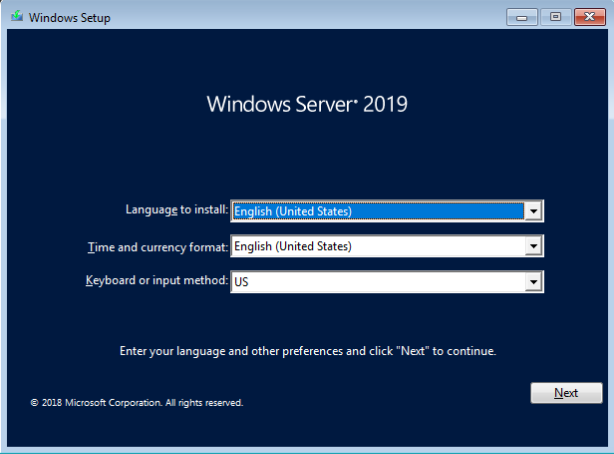
For Windows installation
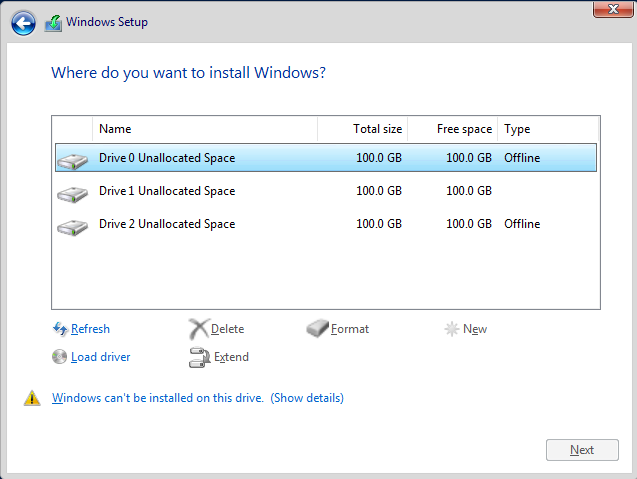
On the Windows installation diaglog, enter your language and other preferences and select Next.
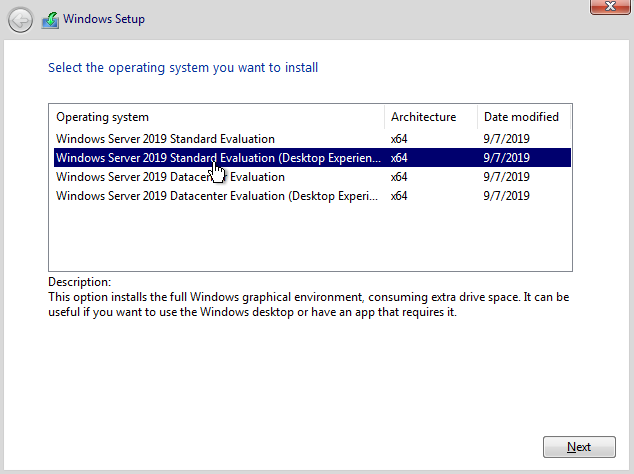
Select the operating system to install and select Next.
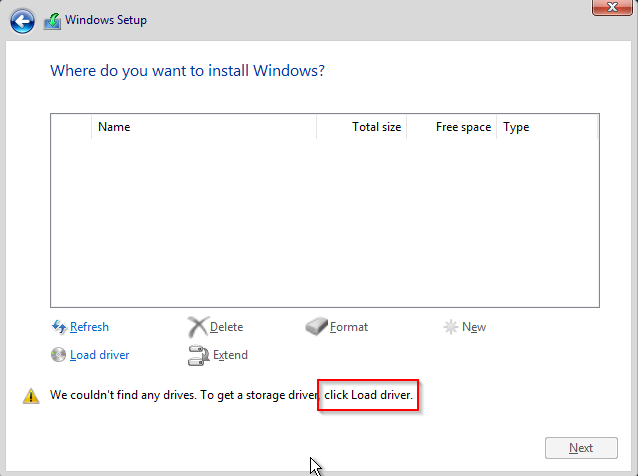
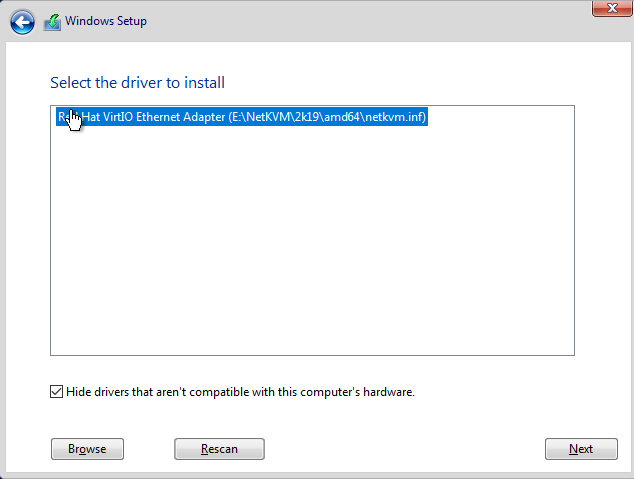
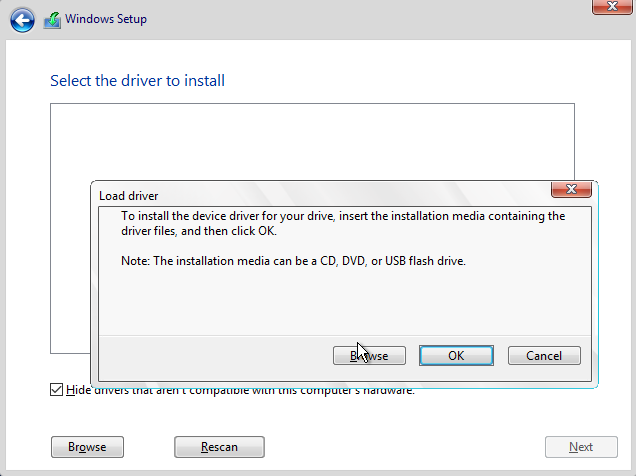
Select Load Drivers to install storage and network drivers.
Select Browse and navigate to the folder to install the ethernet driver. Browse to cdrom where container disk of virtio drivers is mounted and select cdrom->**NetKvm**->**2k19**->**amd64**
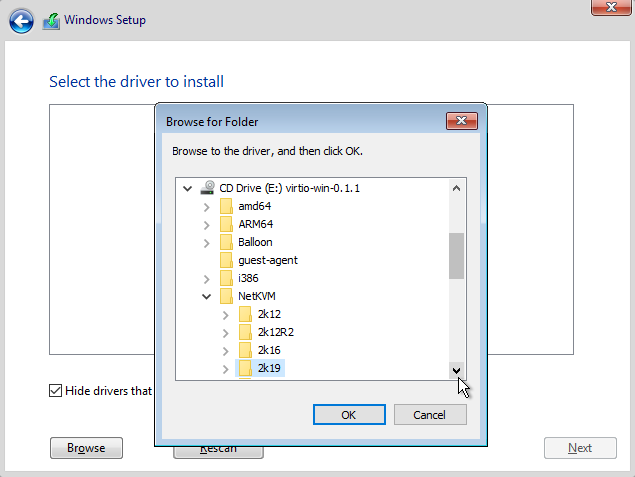
Select the driver and then select Next to install Redhat Virtio Ethernet Adaptor.
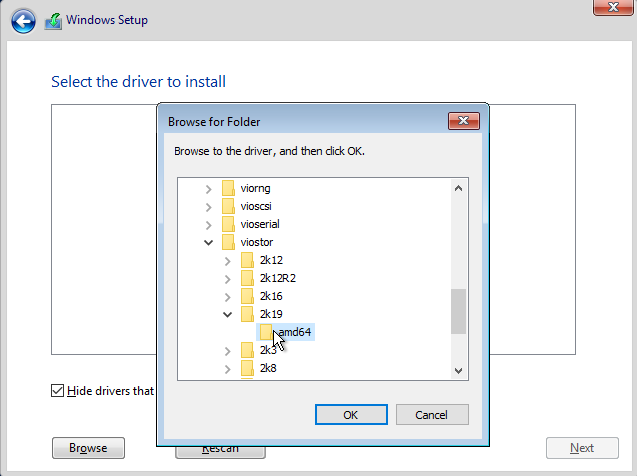
- Select Browse and navigate to the folder to install the storage driver.
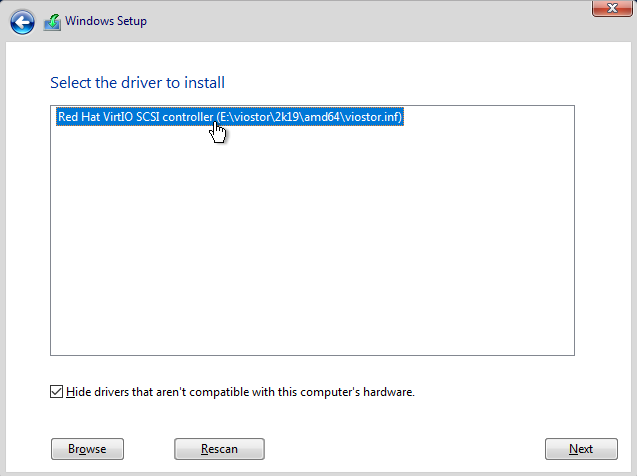
Browse to virtio cdrom and select cdrom->viostor->2k19->amd64
Select the driver and then select Next to install Redhat Virtio Scsi Controller.
For linux installation
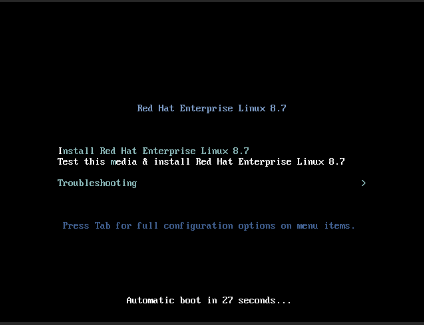
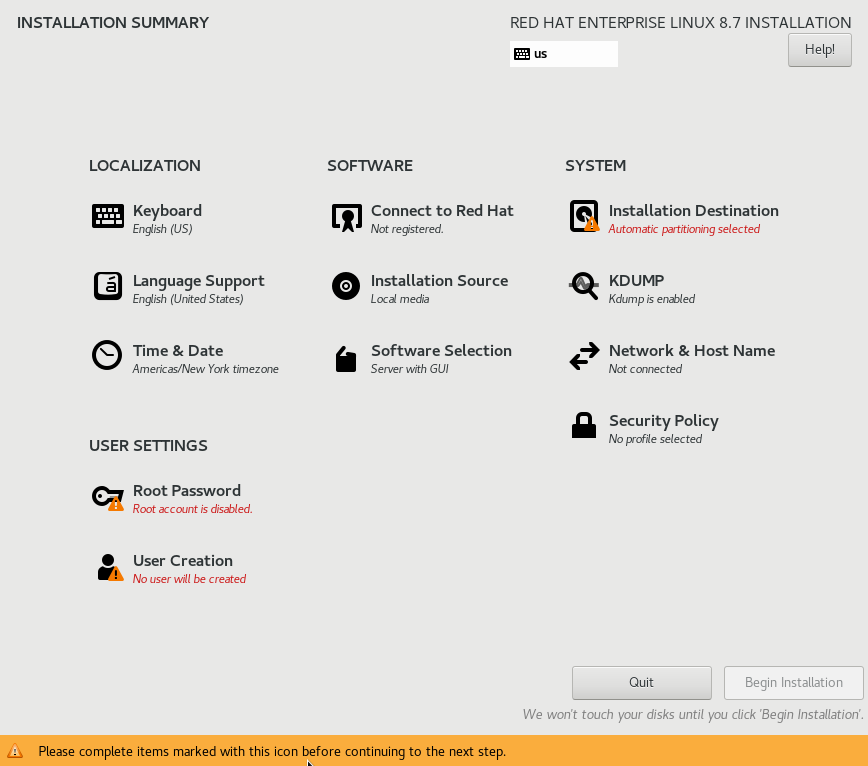
On the Linux installation diaglog, select Install.
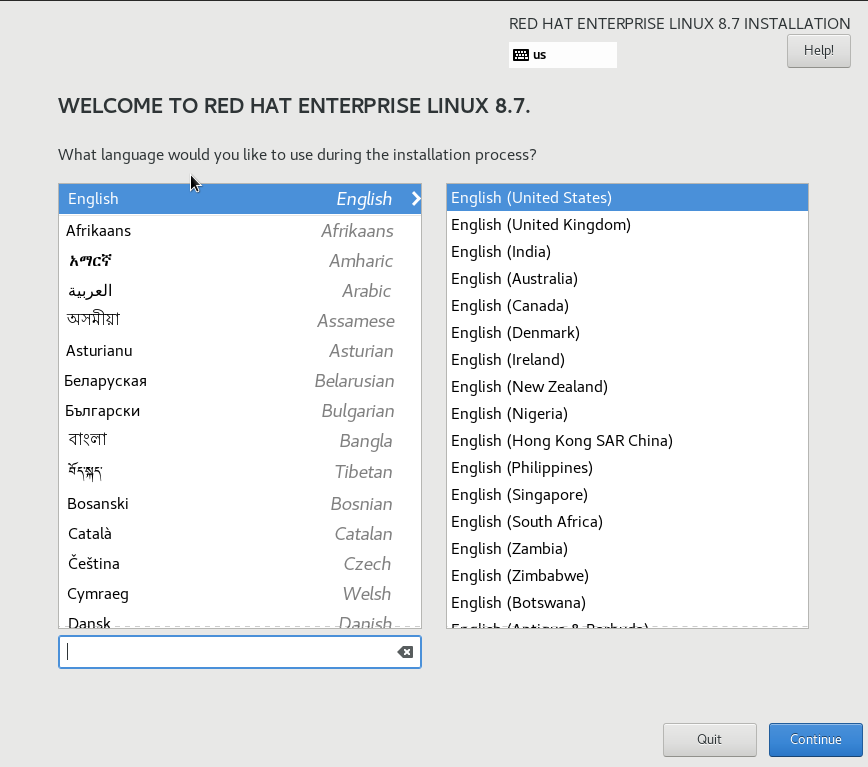
On the Linux installation diaglog, select the language for installation and select Continue.
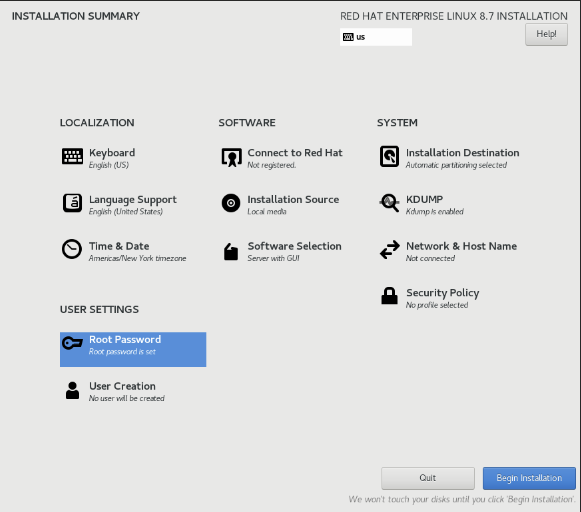
Create a User and eneter the Root Password and select Begin Installation.
Note
Virtio drivers are already installed in Linux, so there is no need to install them.
If the network has not been enabled after installation, Navigate to Settings - Network, and then Enable Wired Connection.
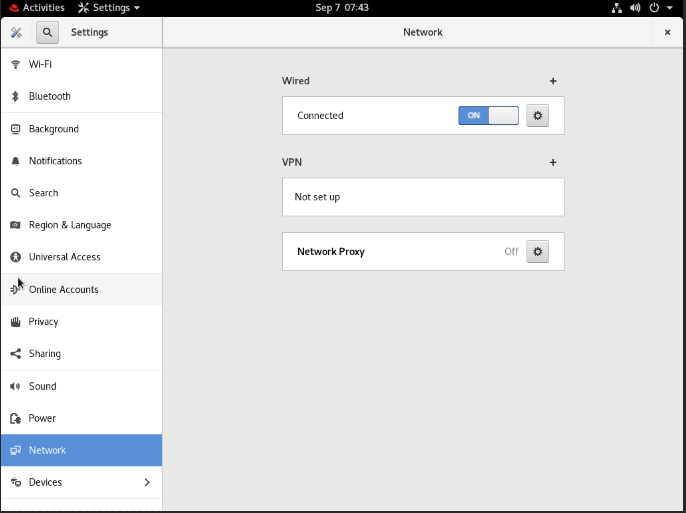
Close the diaglog, and now you can access the VM.
Spec file for Windows and Linux
Spec fie for Windows ISO installation
vagserv1:~/kubevirt-vm-spec> cat windows-iso-dynamic-endpoint.yaml

 apiVersion: v1
 kind: PersistentVolumeClaim
 metadata:
   name: win2019-disk0
 spec:
   accessModes:
     - ReadWriteOnce
   volumeMode: Block
   resources:
     requests:
       storage: 100Gi
   storageClassName: sc-high-m3
 ---

 apiVersion: v1
 kind: PersistentVolumeClaim
 metadata:
   name: win2019-disk1
 spec:
   accessModes:
     - ReadWriteOnce
   volumeMode: Block
   resources:
     requests:
       storage: 100Gi
   storageClassName: sc-high-m3
 ---

 apiVersion: v1
 kind: PersistentVolumeClaim
 metadata:
   name: win2019-disk2
 spec:
   accessModes:
     - ReadWriteOnce
   volumeMode: Block
   resources:
     requests:
       storage: 100Gi
   storageClassName: sc-high-m3

 ---

 apiVersion: kubevirt.io/v1alpha3

 kind: VirtualMachine
 metadata:
   name: win2019-mssql
 spec:
   running: false
   template:
     metadata:
       annotations:
         diamanti.com/endpoint0: '{"network":"blue","perfTier":"high"}'
       labels:
         kubevirt.io/domain: win2019-mssql
     spec:
       domain:
         cpu:
           cores: 4
         devices:
           disks:

           - cdrom:
               bus: sata
             bootOrder: 2
             name: cdromiso

           - disk:
               bus: virtio
             name: harddrive
             bootOrder: 1

           - disk:
               bus: virtio
             name: harddrive2

           - disk:
              bus: virtio
             name: harddrive3

           - cdrom:
               bus: sata
               readonly: true
             name: virtio-drivers
         machine:
           type: q35
         resources:
           requests:
             memory: 8Gi
       volumes:
       - name: cdromiso
         persistentVolumeClaim:
           claimName: win2019-os
       - name: harddrive
         persistentVolumeClaim:
           claimName: win2019-disk0
       - name: harddrive2
         persistentVolumeClaim:
           claimName: win2019-disk1
       - name: harddrive3
         persistentVolumeClaim:
           claimName: win2019-disk2
       - name: virtio-drivers
         containerDisk:
           image: kubevirt/virtio-container-disk
           imagePullPolicy: IfNotPresent
Spec fie for Linux ISO installation
vagserv1:~/kubevirt-vm-spec> cat linux-iso-dynamic-endpoint.yaml

apiVersion: v1
kind: PersistentVolumeClaim

metadata:
  name: centos-disk1
spec:
  accessModes:
    - ReadWriteOnce
  volumeMode: Block
  resources:
    requests:
      storage: 30Gi
  storageClassName: best-effort
---
apiVersion: v1
kind: PersistentVolumeClaim
metadata:
  name: centos-disk2
spec:
  accessModes:
    - ReadWriteOnce
  volumeMode: Block
  resources:
    requests:
      storage: 30Gi
  storageClassName: best-effort
---
apiVersion: v1
kind: PersistentVolumeClaim
metadata:
  name: centos-disk3
spec:
  accessModes:
    - ReadWriteOnce
  volumeMode: Block
  resources:
    requests:
      storage: 30Gi
  storageClassName: best-effort
---
apiVersion: kubevirt.io/v1alpha3
kind: VirtualMachine
metadata:
  name: centos
spec:
  running: false
  template:
    metadata:
      labels:
        kubevirt.io/domain: centos
    spec:
      domain:
        cpu:
          cores: 4
        devices:
          disks:
          - cdrom:
              bus: sata
            bootOrder: 2
            name: cdromiso
          - disk:
              bus: virtio
            name: harddrive
            bootOrder: 1
          - disk:
              bus: virtio
            name: harddrive2
          - disk:
             bus: virtio
            name: harddrive3
        machine:
          type: q35
        resources:
          requests:
            memory: 8Gi
      volumes:
      - name: cdromiso
        persistentVolumeClaim:
          claimName: centos-os
      - name: harddrive
        persistentVolumeClaim:
          claimName: centos-disk1
      - name: harddrive2
        persistentVolumeClaim:
          claimName: centos-disk2
      - name: harddrive3
        persistentVolumeClaim:
          claimName: centos-disk3