Managing Project
Project Overview
Projects are buckets within Tenants that contain Applications. They act as an authorization target and allow admins to set policies around sets of applications to govern resource usage, cluster access, and security levels.
Projects can be within or across clusters owned by a Tenant. Projects combine multiple Kubernetes namespaces together. Allocating resources and consuming resources or configuring RBAC and application management happens in a Project.
Note
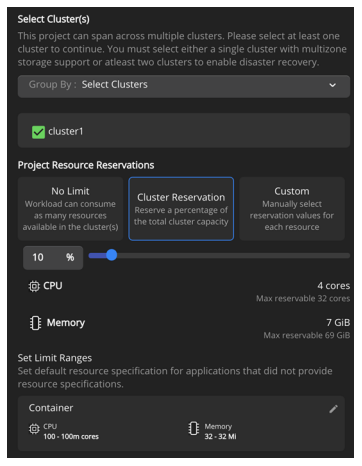
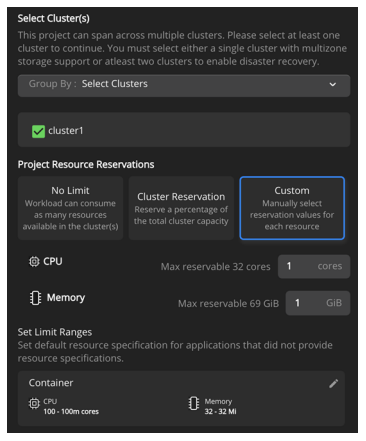
Spektra 3.5.0 UI sets limit ranges on the project by default. The default values for the containers are 32 MB of memory and 100 Millicores of CPU. To avoid issues with application containers, edit and increase these sizes as required.
When you create a new project, you can add a project admin, project member, and a project viewer to the project.
Creating a New Project
To create a Project:
Log into Spektra as a tenant admin.
Select Projects to display the projects page.
Select New Project to display the project creation page.
Enter the following:
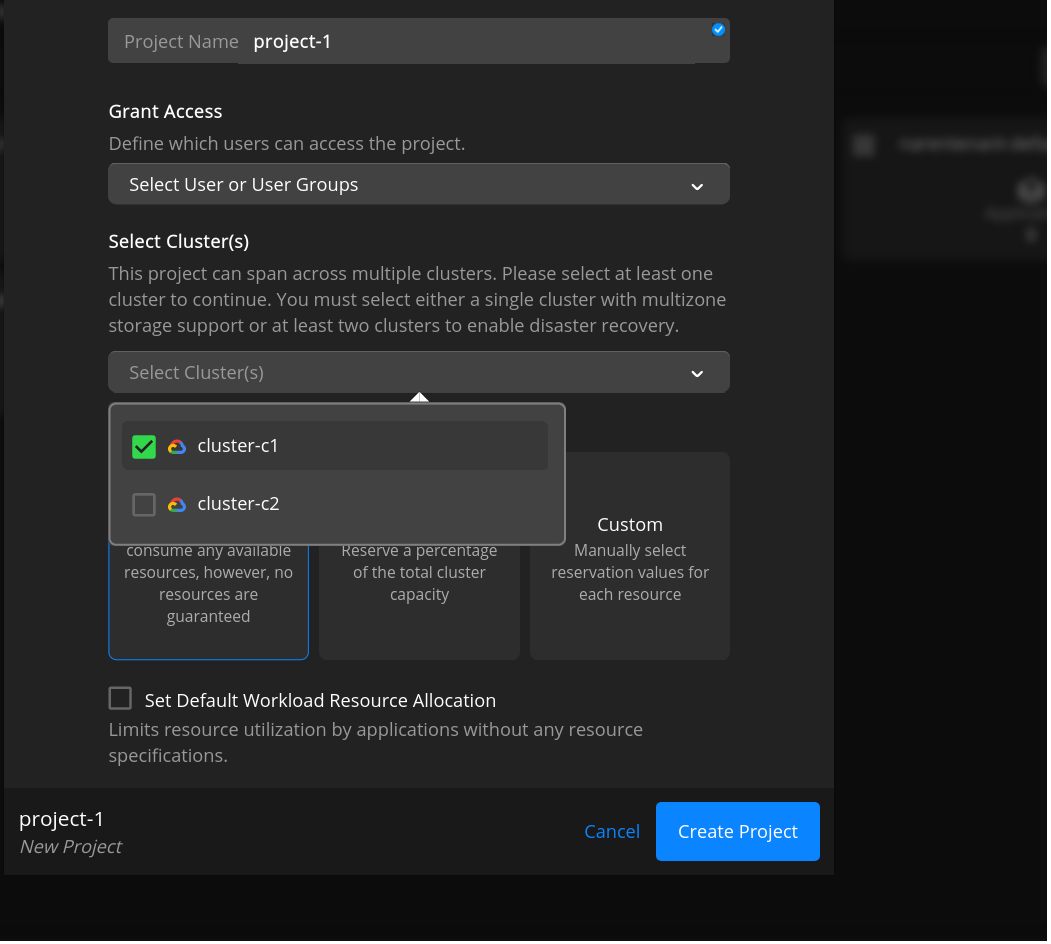
Project Name
Give the project a name. The project name can have a minimum of three and a maximum of 50 characters. You can use only lowercase alphanumeric characters (a-z or 0-9) or a dash (-). It should start and end with an alphanumeric character.
Label
Optionally, add a label.
Setup Access to user
Under Setup Access, select a user from the drop-down and assign the user as the project admin, project member, or project viewer.
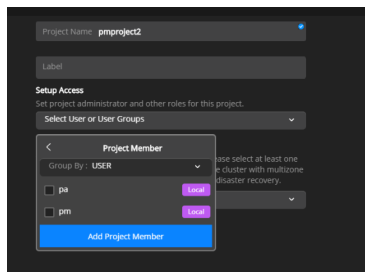
Select User or User Groups from the drop-down.
Select project member to display the drop-down.
Select Group By: USER from the drop-down.
Select a user and then select Add Project Member to add the user as a project member. You can also add the user as a project admin or a project viewer.
Add Clusters to project
Under Select Clusters, select a cluster from the drop-down.
Select Exclude Cluster Resources if you do not want to set resource quota on tenant clusters.
or
The project can span across multiple clusters. Select at least one cluster.
Under Project Resource Reservations:
Select No Limit to assign as many resources available in the clusters.

Select Cluster Reservation to assign a percentage of the total cluster capacity to this project.
Select Custom and manually assign cluster capacity values to the project. You can assign maximum thresholds of CPU and memory for a given project.
Select Create Project
The new project that you created appears on the Projects page.

Creating a New Project as a tenant admin
To create a Project follow below steps:
Log into Spektra as a tenant admin.
Click Projects to display the projects page.
Click New Project to display the project creation page.
Give the project a name. The project name can have a minimum of three and a maximum of 50 characters. You can use only lowercase alphanumeric characters (a-z or 0-9) or a dash (-). It should start and end with an alphanumeric character.
What the Tenant Admin can Access
Go to the Projects page.
In the Project that you created, click Users to view the Users Dashboard.
Click the Access tab to view the projects that you (tenant admin) can access.
Only project admins or tenant admins can view the Access tab.
A project member or a project viewer cannot view the Access tab.
Tenant Admin Observability
The tenant admin can
View CPU, memory, storage, and network for the cluster, tenant, projects, and applications within the tenant.
View events (related to Kubernetes objects) per cluster.
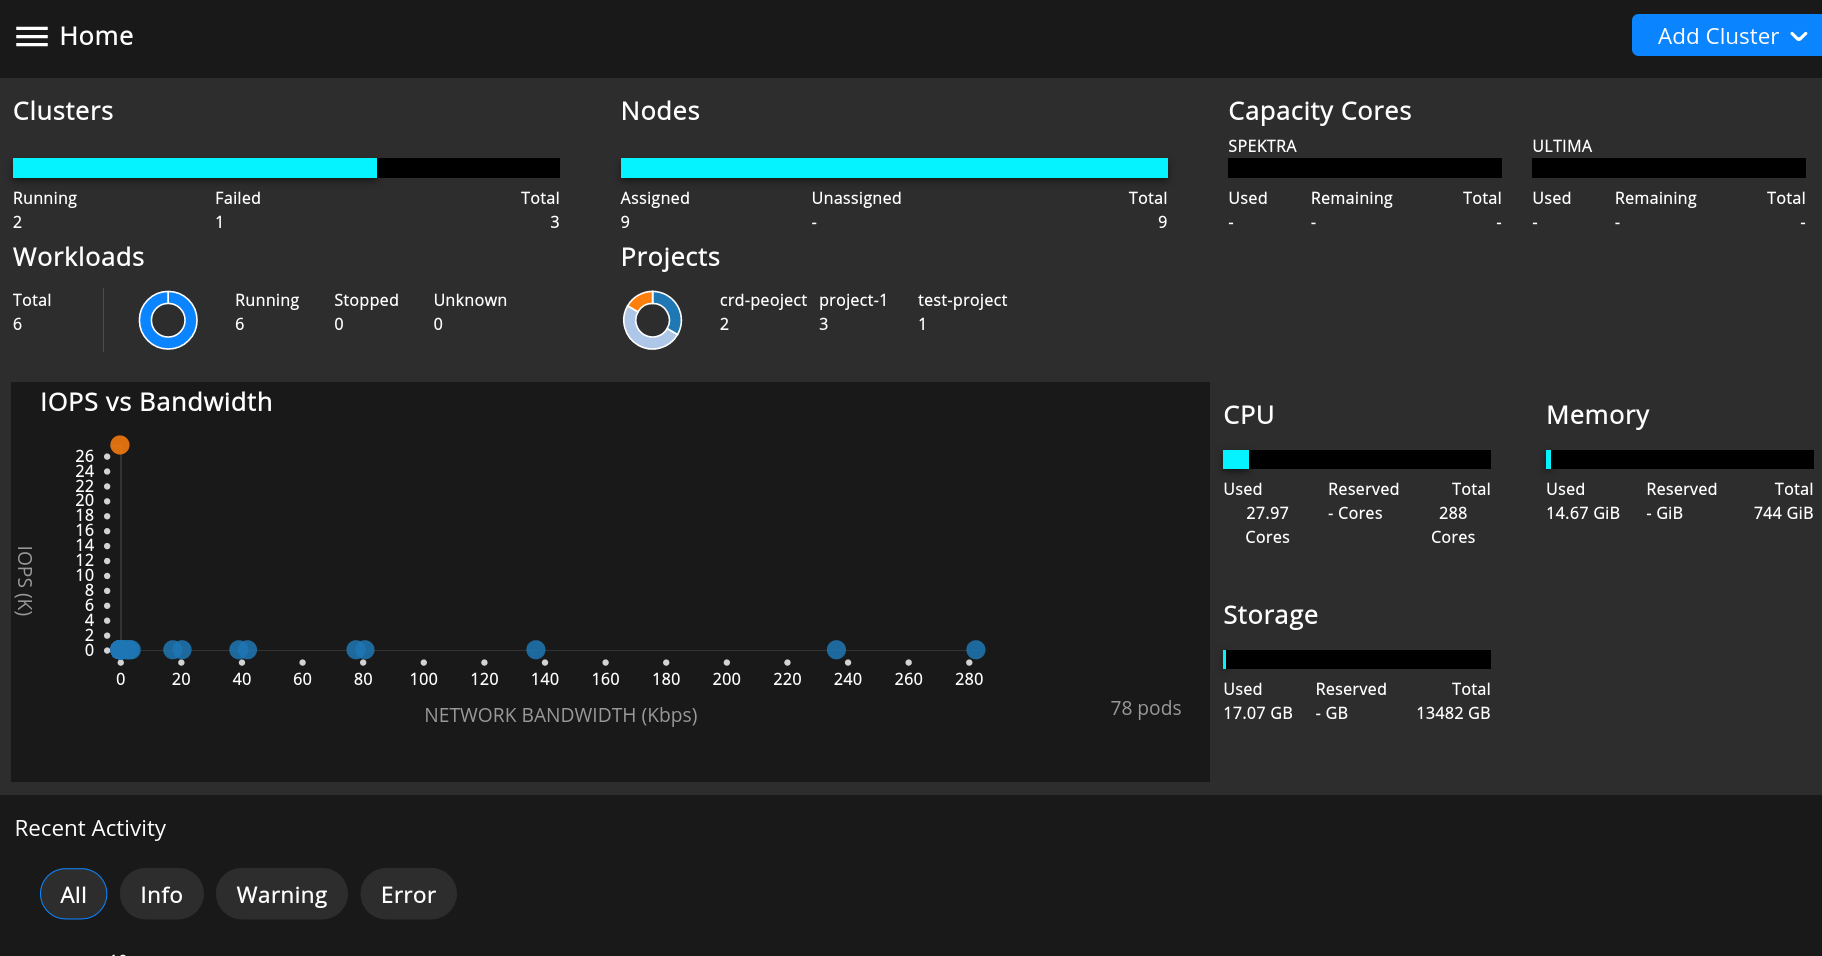
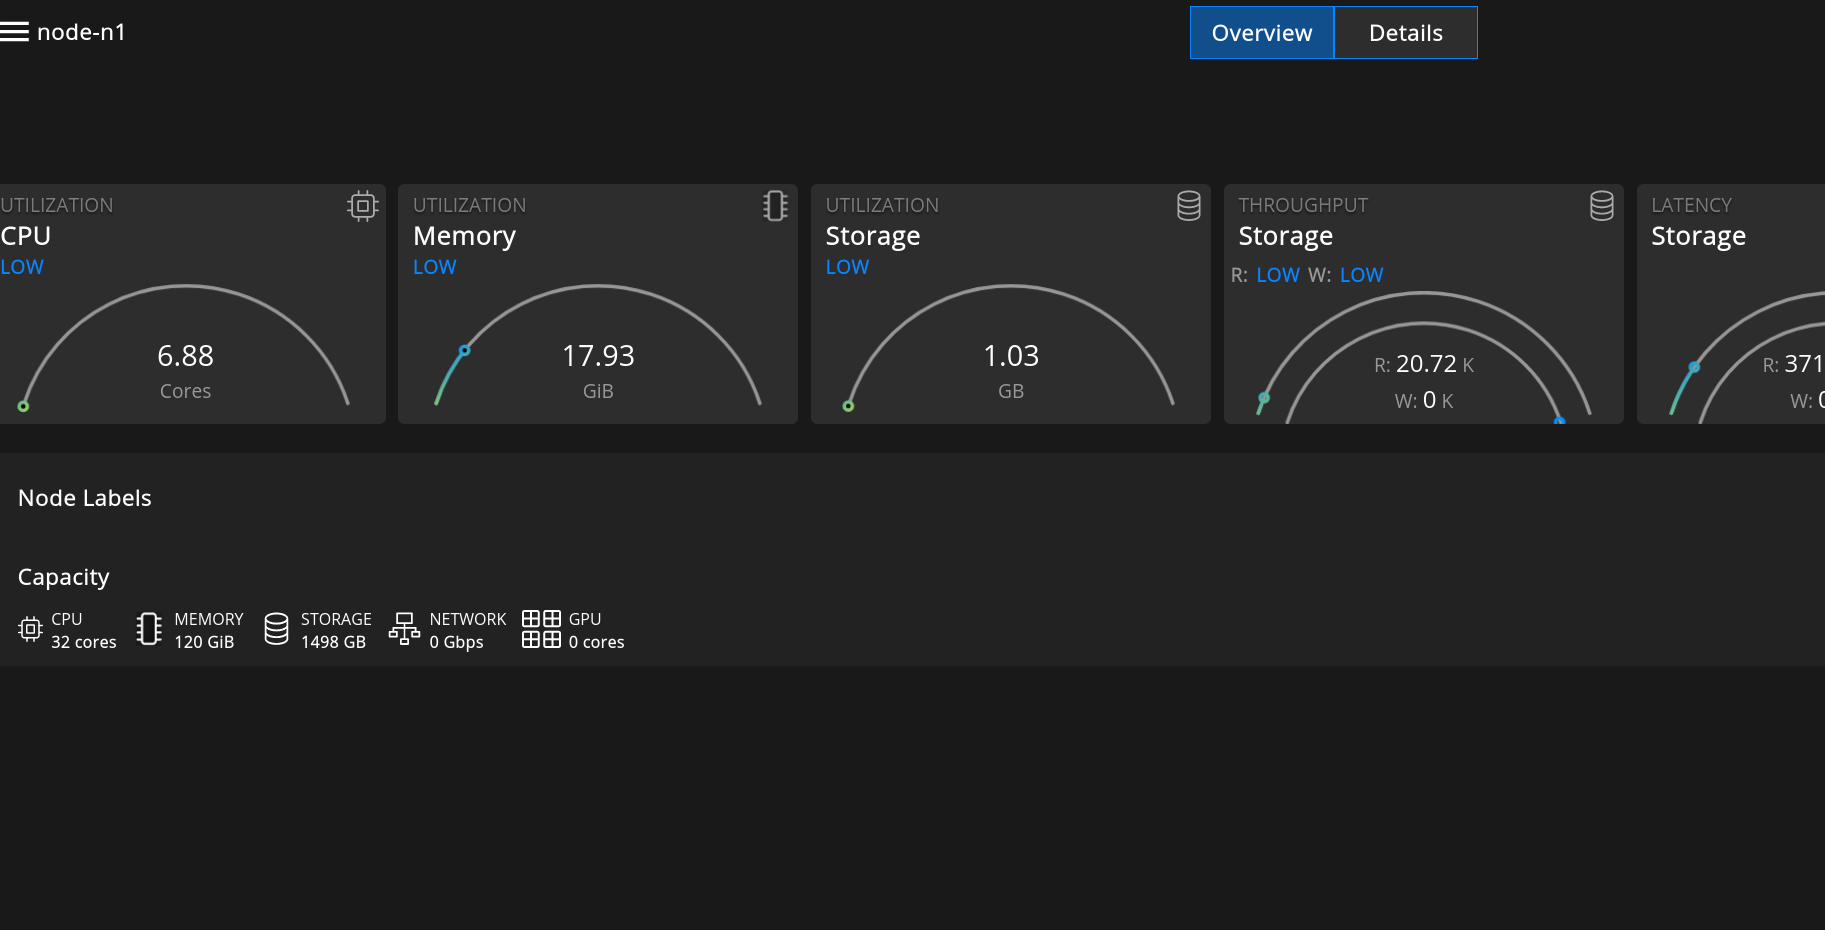
The tenant admin can also view the CPU, Memory, and Storage Network metrics for each node.
Adding a Project Admin
Go to the Projects page, click Users, and click the Access tab to display the Access page.
Click Add Member at the top right of the page to display the Add Member menu.
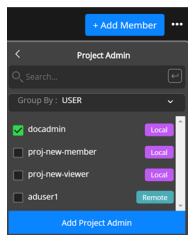
Select project admin to display the drop-down.
Select a user (docadmin in this example) and click Add Project Admin to add the user as a project admin.
Creating a Local User for the Project
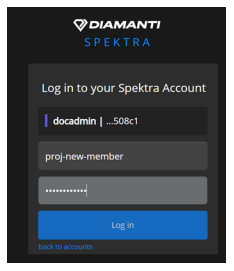
Create a new local user called proj-new-member for the project. See Create a Local User.
The local user is created successfully and the user name appears in the list of users on the Tenant Settings page.
Adding a New Project Member
Go to the Projects page, click Users, and click the Access tab to display the Access page.

Click Add Member at the top right of the page to display the Add Member menu.
Select Project Member to display the drop-down.
Select a user and click Add Project Member to add the user as a project member.
Creating Another Local User for the Project
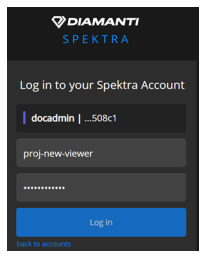
Create a new local user called proj-new-viewer for the project. See Create a Local User
The local user is created successfully and the user name appears in the list of users on the Tenant Settings.
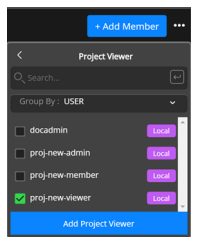
Adding a Project Viewer
Go to the Projects page, click Users, and click the Access tab to display the Access page.
Click Add Member at the top right of the page to display the Add Member menu.
Click Add Member at the top right of the page to display the Add Member menu.
Select Project Viewer to display the drop-down.
Select a user and click Add Project Viewer to add the user as a project viewer.
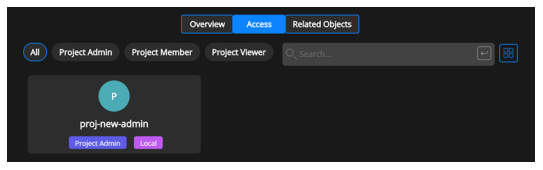
Viewing the Project Users
Go to the Projects page, click Users, and click the Access tab to display the Access page.
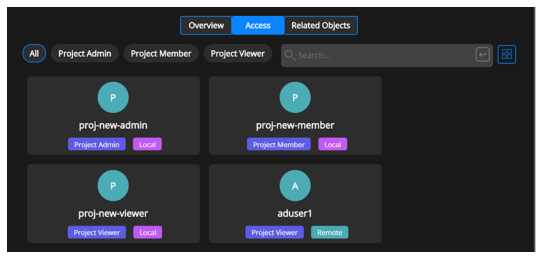
The Access page lists the project admins, project members, and project viewers.
Adding a Group
Go to the Projects page, click Users, and click the Access tab to display the Access page.
Click Add Member at the top right of the page to display the Add Member menu.
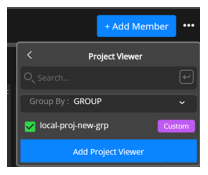
Click Group By to display a drop-down.
Select a group from the list.
Click Add Project Viewer to add users in the group as project viewers.
Go to the Projects page, click Users, and click the Access tab to display the Access page.
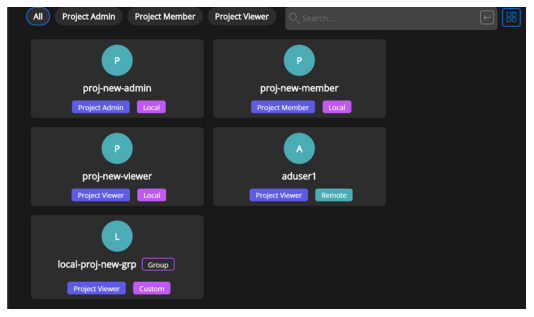
The users in the new group are added as project viewers.
What the Project Admin can Access
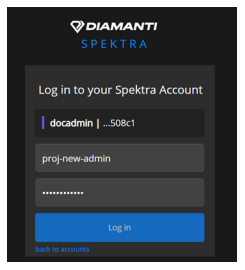
Log in as the project admin.
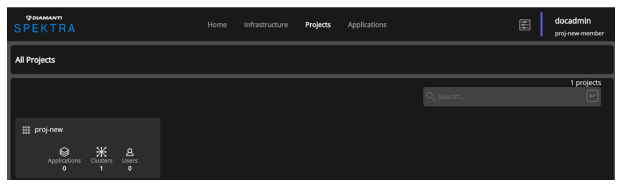
Click Projects to view the list of projects that you can access.
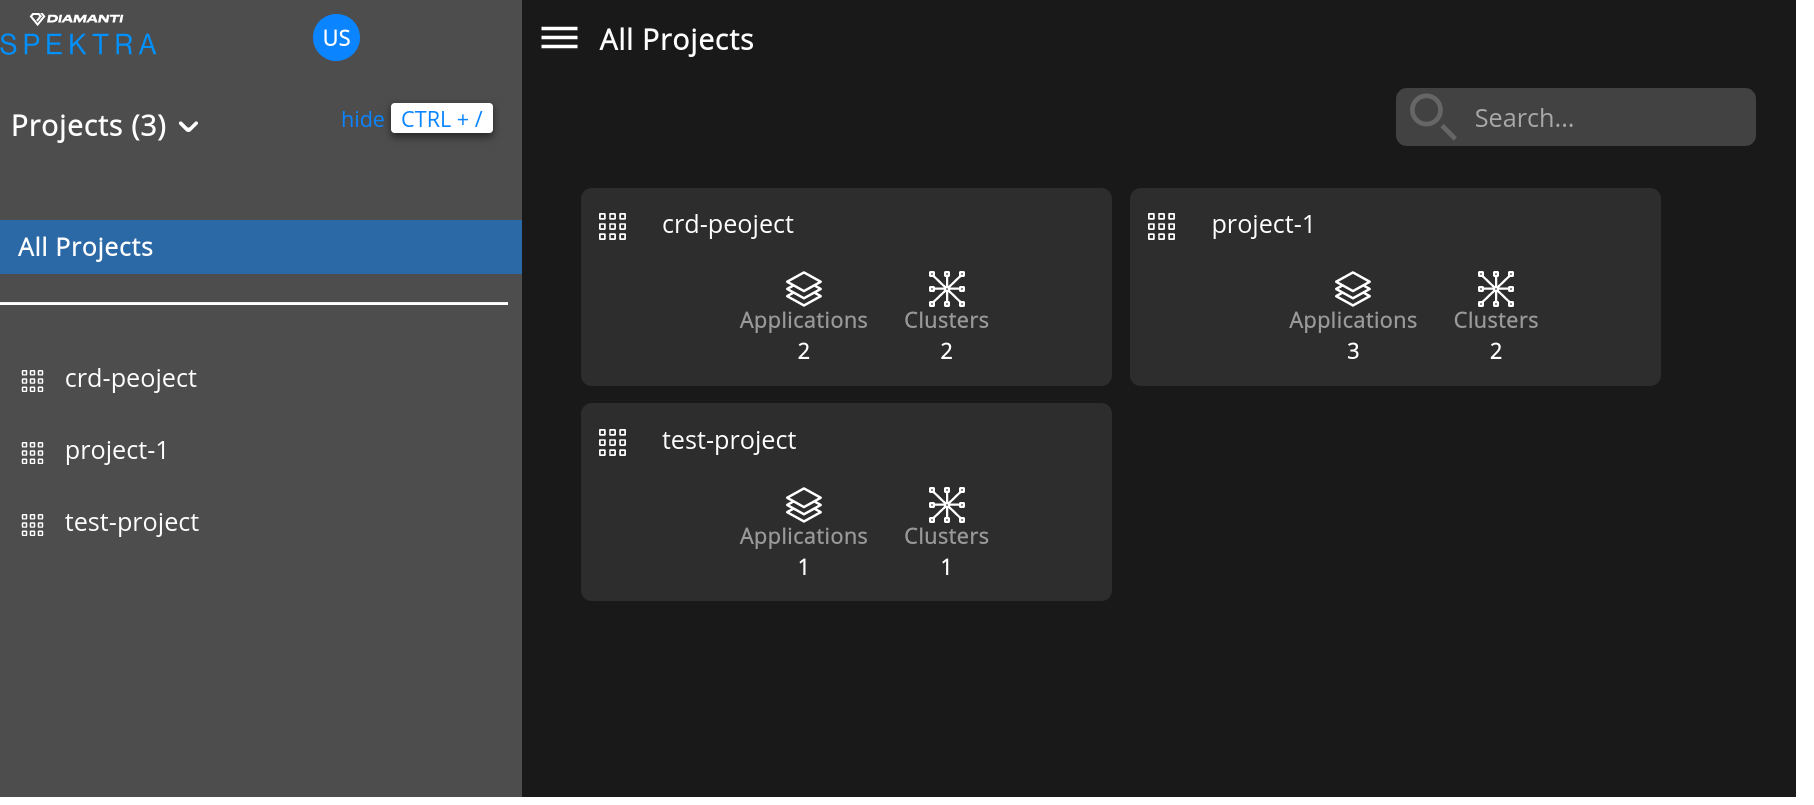
You can view only the projects that you are associated with. You cannot access other projects.
Click Infrastructure > Clusters to display the list of clusters that you (project admin) can access.
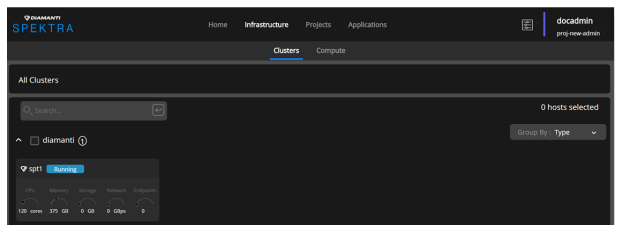
Similarly, since the project was created in a specific cluster, you (project admin) can access only this cluster. You cannot view other clusters.
Click Projects to display the projects page.
Click Users to display the list of users.
Click the Access tab to view the list of Project Users.
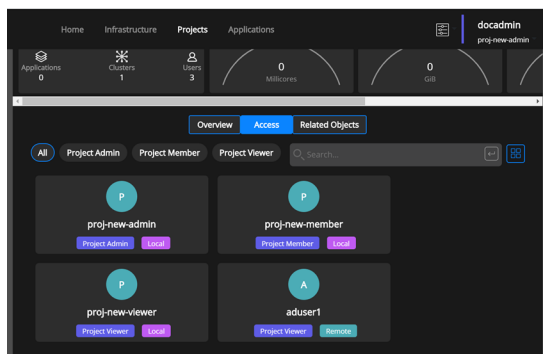
The project admin can view all the users in the project (the project member, Local project viewer, and the Remote project viewer).
However, the project admin cannot view details of the tenant admin.
The project admin can add users who do not have a tenant admin policy specified.
Similarly, the project admin can add Groups that are not created by the tenant admin.
What the Project Member can Access
Log in as a project member.
Select Projects to display the list of projects.
The project member can see all the users that are a part of the tenant. However, the project member cannot perform any user management. But, the project member can create and deploy the applications.
What the Project Viewer can Access
Similarly, if you log in as a project viewer, you’ll find that the project viewer cannot perform any user management.
The project member can create an application, but the project viewer cannot.
Log in as the project viewer.
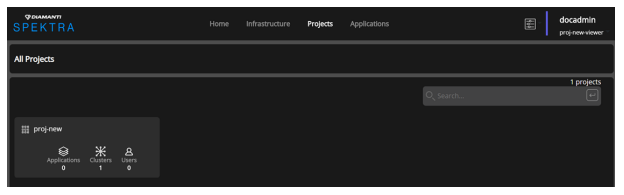
Click Projects to view the list of projects that you can access.
You (the project viewer):
Can see all the users who are a part of the tenant.
Can view only the projects that you are associated with.
Cannot access other projects.
Can view applications that are already deployed.
Cannot deploy any application.
Project viewer can view CPU, memory, storage, and network for the projects and installation within the associated project.